Neighbours talking over the garden gate has long been a tradition. They share gardening tips, complain about the weather and pests yet are ever eager to discuss their gardens. That is what I had in mind when creating this blog. So stop by my garden gate to find out the latest happenings in my garden.

Happy Gardening!

Garden Gnome
"All my life through, the new sights of Nature made me rejoice like a child." ~ Madame Marie Curie"
Showing posts with label perennials. Show all posts

Tuesday, July 13, 2010

Rogue Daisy

rogue daisy
Rogue Daisy
July 9, 2010

An interesting thing happens after you rip out old garden beds.  Every once in awhile an old plant from the former bed reappears in the new garden bed or if the old bed was seeded/sodded through the grass.  A couple of days ago I discovered this pretty daisy poking through the now grass where a former garden bed was.  What really surprises me is this particular area was where we took out 6 large spreading evergreens so the chances of disrupting any plant left behind was quite high.  Despite that tulips, daffodils, crocuses and not daisies are popping up through the grass.  It is rather pretty!  I have to smile each time I discover one of these rogue plants.

Happy Gardening!

Garden Gnome
©2006-2010


Wednesday, May 19, 2010

The Unknown Has Been Identified as Columbine

Columbine
(Aquilegia)
May 10, 2010

I recently posted about 2 clumps of unknown plants coming up in the gardens.  I knew I had identified them previously.  They are Columbine (Agilegua) and thanks to a recent rip-out (more to come on that) it looks like I am now down to one clump.  It is quite pretty so hopefully will spread in the current location.  I may pick up a few more to plant along with this one just to help fill the bed.  I am glad this pretty little plant has been re-identified!
 
Happy Gardening!

Garden Gnome
©2006-2010


Wednesday, April 14, 2010

Peonies

peonies
Peonies (Paeonia)
April 12, 2010

We have two areas in the gardens that have Peonies.  The problem with both of these locations is they are in areas that will be ripped out.  So I'm letting them come up this year and will transplant after they are finished blooming.  In the meantime I'm looking forward to seeing their showy blooms.

Happy Gardening!

Garden Gnome
©2006-2010


Friday, April 09, 2010

Unknown Breaking Ground

periwinkle
Unknown
April 6, 2010

Two small clumps of periwinkle unknown continue to thrive despite the ripouts and disruptions.  I know I identified this plant a couple of years ago so am going back through my plant files and will post the name as soon as I find it.  They are poking up through the ground looking rather cheery.  Soon they will be in bloom!

Happy Gardening!

Garden Gnome
©2006-2010


Friday, June 26, 2009

Iris verna

iris verna
Iris verna


Pictured is the Iris verna growing in one of our gardens. Iris verna is a beautiful, delicate looking wildflower that is hardy throughout Canada and the United States. It blooms in early spring. This clump forming iris is well behaved in the garden. Deer It reaches a maximum height of 12 inches at maturity making it an ideal border plant or as a statement plant. Iris verna grows best in light shade to dappled sunshine. Slugs can be a problem but rabbits and deer will leave them alone. Some nurseries are now carry these plants. You can bring rhizomes home from the wild or get some from other gardeners who have established clumps wanting to divide them.

Happy Gardening!

Garden Gnome
©2006-2009


Friday, June 19, 2009

New Raised Beds Layout

Over the past weekend we worked on two new raised garden beds (more here). The beds are being created while we are continuing to rip out existing vegetation so the new beds were not planned using Garden Manager software mainly because the beds were going in late spring. I would have to reboot in Windows as well since this software is not Mac compatible. I've been using the combined with square foot gardening method combined with companion plantings in raised beds for 8 years now. Over the years I have learned a lot with respect as to what I can and can't do with this type of gardening. The grid is critical for square foot gardening. This year the beds are being laid out very similar to my former large square food garden as they are created because this layout has been tried and tested. However, the layouts are being designed for maximized planning for the 2010 growing season that will begin as soon as the first seed catalogues of the 2010 season arrive.

bed 1 garden planBed 1

I used MS Word for windows to create a template for the garden beds. If you have followed this blog you will know I number my beds usually in order of creation. This is simply for reference. At the top of the template I put the label 'bed _____' which is important not only for the working sheets but also the final layouts. Each bed is 4' x 10' so I created a table consisting of 4 columns and 10 rows. That gave me 40 cells representing the 40 squares I have to work with in each bed. I use a separate layout sheet for each bed. The beauty of planning using a computer is you can easily change the cells as desired until you get what you want then plant according to your plan when it is finished. I printed off a copy then set about working with the plant I had.

A square foot garden bed should not be planted willy nilly. It should be planted according to the grid. The location and sun exposure needs to be considered. I like to lay the beds in a north to south orientation with taller plants at the north end of the bed and shortest plants at the south end. This maximizes sun exposure for all the plants. I plant parsley and other plants that rabbits like to munch on, towards the centre of the bed and behind a barrier of marigolds. This technique worked well for my former garden but I will be adding a low fence around the entire perimeter of this garden. Each plant is then set in place and recorded on the working copy. For bed 1 where all of the plants are annuals there is no need to include the scientific names on either the working sheet or the computerized copy but they are indicated in my gardening journal along with notations as to their performance and any problems.

Pictured is the layout for Bed 1 consisting mainly of tomatoes, peppers and greens. Thirty-two of the 40 squares are currently planted. Over the following week I will be checking the local nurseries for any compatible plants I can pop in these squares. The nice thing about buying plants late in the season is their prices are greatly reduced. With a little TLC they will perform quite nicely as well.

herb garden planHerb Bed

Bed 2 is the herb garden consisting of perennials, biennials and annuals. The herb bed takes a bit more planning. Unlike an annual bed, only portions of this bed layout will change over the next several years. Over time the grid becomes non-existent unless it is constructed from a material that doesn't break down. Plant identification tags have a tendency to go missing as well. I like to use the computerized copy of the layout as later identification of the various herbs. I include the botanical names as well to avoid confusion as there are often more than one cultivar of the herb growing in the bed. Above the name of each herb I indicate in brackets whether the herb is perennial, biennial or annual. It really helps with the overall herb bed planning because at some point there won't be room for the annual herbs as the perennial and biennial herbs spread.

It is important if considering any invasive herb especially those in the mint family to contain them in pots dug into the space, plant them in their own small raised beds or confine them to areas where spreading is restricted. If this is not done they will quickly take over your herb bed choking out the other herbs. So choose your herbs wisely!

Twenty-six of the 40 available squares are planted. From experience sage and chives get quite large so over time will likely take up the end 8 square feet but for now they will only take up one square each. The squares around these two herbs will be planted with annuals for the time being with the exception of lavender started from seed. I have not had good luck starting lavender from seed but if successful I will move the plant to a more appropriate location. In the meantime I have a few herbs started indoors to be transplanted to the garden when they are ready and I will again be checking the nurseries.

Happy Gardening!

Garden Gnome
©2006-2009


Thursday, May 14, 2009

Please Help Identify


"Unknown"
March 26, 2009

Please Help Identify: Oh the joys of moving into a home with overgrown gardens and still discovering new plant varieties as we continue our quest to tame the jungle. We have several patches of this unknown plant. I think it is a daylily based on the leaves and flower appearance. The flower is two tone yellow with six petals, 3 on 3 on a single stem. The flower is about 3 inch diameter. It bloomed from approximately March 23 to April 11. I have searched daylily and perennial databases with no luck. If anyone could help me identify this beautiful I would be very grateful.

Update (May 15, 2009): Thank-you Kim for sending me a link where this plant has been classified as: Home › Plants › Ornamental Groups › Bulbous Plants › Liliaceae (Lily Family) › Tulipa (Tulip) › Tulipa sp. (Unidentified Tuliips). My powers of observation must be still in winter mode! This explains the daylily appearance of the leaves but closer inspection the leaf arrangement resembles more of a tulip only thin, long and shiny. The flower petal arrangement resembles more of a daylily than a tulip so the search continues. Thanks to Kim I will narrow down my search to the Tulipa sp. I put the picture on my iPod Touch so I can ask at the nurseries on my next trip and will continue the online search. I will update again as soon as the plant is identified.

Happy Gardening!

Garden Gnome
©2006-2009


Sunday, September 14, 2008

Sweet Woodruff (Galium odoratum)

This is the fifth home we have owned and while each house/property presented unique challenges this property has presented the problem of over growth. The landscaping is mature as far as trees, bushes and shrubs. There really is too much! Compounding the problem are several perimeter, pocket garden beds planted willy nilly with everything imaginable. Despite moving here the end of June 2007 we are still in the tear out mode. At the same time we are doing a fair amount of pruning because we want to keep the look of the gardens without the wild, unkept look. It is obvious that some plants have to go. In order to do this I have been identifying what is growing on the property then eliminating the problem plants while keeping or transplanting those plants that give us the look we want.


Sweet Woodruff
(Galium odoratum)

A sidewalk runs from the driveway to the back steps leading to the lower covered patio. On the house side this forms one small flower bed about 2' x 6' that would be perfect planted with a low growing ground cover. Also bordering the sidewalk on the house side is a L-shaped bend actually more like a P-shape with a narrow tail and wide bed in front of the kitchen window. On the other side of the sidewalk is a meandering garden bed with various plants that in most cases need to be moved. On of these plants is Sweet Woodruff (Galium odoratum) identified with the help of one of my kids. There is a good size patch of this plant along with a smaller one.

and in various edible products (May wine, sausage, jam, jelly and soft drinks) however high levels of Sweet Woodruff is a very pretty, low growing, mat forming ground cover popular for shady locations. It has small, white, four petal flowers formed in cymes (each flower on one stem with stems joined together on a single stem) in the spring. The simple leaves form whorls of six to nine giving this ground cover a unique, delicate look. Sweet Woodruff is said to be slightly invasive but I have not found that to be the case. If anything I would like it to spread a bit more. Propagation is by division. When dried, Sweet Woodruff resembles fresh mown hay or slightly vanilla scented. Dried Sweet Woodruff is used in potpourri and it has both culinary and medicinal uses. Coumarin (a blood thinner) that gives this herb its scent can cause headaches while very high doses can cause vertigo, central paralysis and apnea while in a coma. Sweet Woodruff has not been used as a flavouring in Germany since 1981 however, home growers continue to use dried Sweet Woodruff for flavouring a variety of foods. I am going to stress the high levels as you would have to eat a lot of Sweet Woodruff to experience the negative side effects. Normal culinary levels of dried Sweet Woodruff is unlikely to cause any negative side effects.

I would like to establish a second patch of Sweet Woodruff. It would be a perfect ground cover for the first small garden between the sidewalk and house. Not only would it be pretty and delicate looking, it would be maintenance free. The plant will be ideal for potpourri as well. This will be one herb that I will be growing indoors as well.

Happy Gardening!

Garden Gnome
©2006-2008


Friday, September 12, 2008

Vinca major (Bigleaf Periwinkle)

One of our smaller garden beds has a pretty green and white creeping vine that has little purplish blue flowers in the early spring to mid-summer. It was quite apparent that the vine was of the spreading nature. It had filled the garden bed and was heading down the divider between our driveway and our neighbours. Our driveway is paved but his is gravel so the vine had no problem spreading and rooting. Still it was pretty so I set out to identify whether the vine was friend or foe. At the same time I started trimming it back and asked the neighbour if he wanted it removed from his side. This is always a nice thing to do if something you have in your garden encroaches onto the neighbour's yard to ensure good neighbourly relationships.


Vinca major varigata Louden
(Big Leaf Periwinkle)

Vinca major L. 
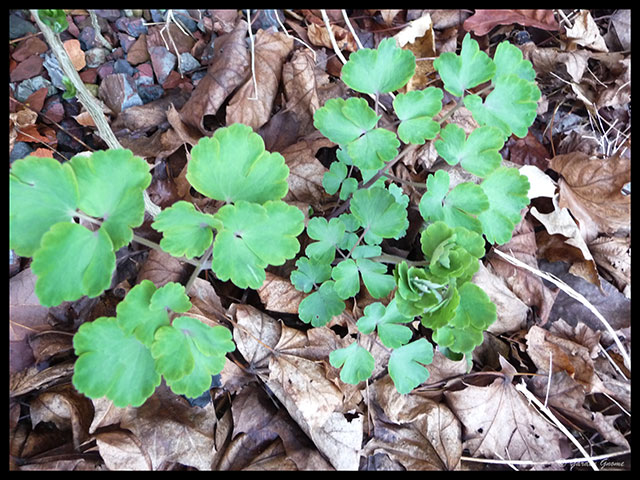
is a very fast growing perennial, ornamental ground cover that has small, five petal, purplish blue flowers often referred to as Bigleaf Periwinkle. The leaves are green with creamy white edging. It is not a climber but can be draped over edges and fences to soften the look. It looks very pretty trailing over the hard edges of flower beds and retaining walls. Vinca major grows nicely in full sun to shade. This vine is low growing at 8 to 12 inches high but it is quite invasive with trailers spreading up several feet. This vine can easily take over an entire garden forming a dense mat and overwhelming other plants. However, its dense growing pattern also keeps any patches of Vinca major weed free. Vinca major is a wonderful substitute for grass because in those areas where you don't mind its spreading nature. It is rather maintenance, pest and disease free. Neither deer or rabbits will eat Vinca major. Aphids may occasionally appear on the leaves but can easily be removed using a strong spray of water. This vine is perfect for sloping areas to prevent soil erosion. In temperate areas the vine is an evergreen. Cuttings can be taken to grow in containers and hanging baskets. Vinca major is quite drought tolerant and over watering will kill the vine so be careful to not over water. It is best to water the soil rather than the plant to prevent an fungal spores present in the garden from settling on the leaves. Propagation is by cutting. If you want to remove Vinca major the best way is to manually pull it out. Do not mow it because the vine has the ability to re-sprout.

Now that I have identified this creeping vine the next decision is whether to move it to another location. It would be better to move this invasive vine to one of the confined garden beds where it can only spread as far as the surrounding hard surface barrier like the space between the house and side walk. I will also be starting a few pots of Vinca major, over winter indoors then use them in planters next spring.

Happy Gardening!

Garden Gnome
©2006-2008


Tuesday, August 19, 2008

This Lawn is Your Lawn

I'm of the mindset that every household should have a vegetable garden. This is not a new idea as Victory Gardens were encouraged as a way to save energy and keep people fed during World War I and World War II. Twenty million of these gardens existed producing 40% of the vegetable produce consumed nationally in the United States. Planting a vegetable garden was seen as a national duty.


I hope you enjoy the video. As you know this is a Canadian blog so I try to find content of interest to other Canadians. The video focuses on the American White House but the message really can be applied to any country. Our elected officials should be setting an example and practicing what they preach. I urge everyone to write their elected official at all levels of government conveying the idea of encouraging Victory Gardens as a way to help the environment, feed the hungry and encourage people to help themselves. I urge everyone reading this blog to grow fruits and vegetables at some level. If you can, grow more. If you don't have a garden now is the time to start one! Get involved. Start a community garden or a friendship garden. If you have more produce than you or your family can use when preserved for the following year, consider donating it to a food bank or church agency that will see it gets to a family in need. Encourage everyone you know to grow a vegetable garden. Spread the word, sign petitions and write letters but first ensure you are growing a vegetable garden!

Today we have the luxury of huge supermarkets stocked to overflowing with every kind of fruit and vegetable imaginable. However did you the average food travels 1500 miles from farm to table? Revive the Victory Garden and Eat Your View are two organizations that are encouraging households to grow Victory Gardens again as a way to reduce global warming. Planting edible landscaping makes good sense environmentally and economically. When you grow your own you end up with nutritious, fresh vegetables at a fraction of the cost of store bought. With gardening comes preserving either by canning, freezing or drying further reducing your food costs. It's a win win situation.

Did you know that home canning continues to increase fueled by the concerns over rising food prices. While a pressure canner necessary for canning low acid foods (vegetables, meats, etc.) will range in price from about $100 to $500 depending on the brand and size, they will more than pay for themselves within one season. Not only do you save money by preserving your own, you also can take advantage of buying local produce in season and preserving enough to get to the next season. I should mention that my pressure canner is in use year round often two or more times per week. Recipes, methods and pictures can be found on my cooking blog.

I've often mentioned on this blog and elsewhere that even small space gardening can be quite productive. Think outside of the box. Replace the environmentally unfriendly lawn with edible landscaping. Many herbs have beautiful flowers so plant perennial herbs instead of annuals. Those dandelions may be a weed in your lawn but if you don't use herbicides they make tasty salad greens. Use trellises and arbours to grow fruit and vegetables up instead of spreading. A small balcony can be used for container gardening. Small patches of land between sidewalk and house can be planted with vegetables or herbs. Window sills can be used to grow herbs and greens year round. Grow your own sprouts (mustard, bean, alfalfa, etc.) indoors year round. I've even had success growing tomatoes, peppers and potatoes indoors. Be sure to save seeds from your garden to reduce the cost of buying seeds the following year.

Happy Gardening!

Garden Gnome
©2006-2008


Tuesday, May 06, 2008

Irish Moss


Irish Moss
(Sangia subulata)


I planted Irish moss in a small border bed bordering the garage. The bed is about five feet long, about two feet wide and is tucked between the garage and sidewalk. Like the other border beds here there is a deep layer of gravel for drainage in this bed. Here the Irish moss will be able to spread freely to fill the bed yet be contained from spreading elsewhere. What I like about Irish moss is not only is it low maintenance, it is environmentally friendly. Unlike grass it does not need trimming and because it is so thick, the Irish moss bed should remain relatively weed free. Unlike English ivy, Irish moss does not provide a habitat for rodents nor will I have to worry about it climbing on the brickwork. Irish moss is the perfect solution!

Irish moss (Sangia subulata) is a terrestrial plant also known as Scotch moss (Sangia subulata Aurea) is not a true moss but rather an herb. It forms tight mounds like moss. Chondrus crispus, an edible sea weed that is used as a medicinal herb and thickener is also commonly called Irish moss. Sangia subulata is ideal as a ground cover with low growing bright green foliage and small, star shaped white flowers. Scotch moss has small, star shaped yellow flowers. Irish moss can be grown in any soil while Scotch moss prefers clay soil making both plants ideal for problem areas. Both spread rapidly forming a low growing carpet of green that is deer resistant and tolerant to foot traffic. They are hardy in zones 4 to 9. When planting, space 12 inches apart in full sun to partial shade. Don't over water or allow to dry out. Propagation is done by cutting out sections of an Irish moss clump then pressing the section into moderately moist soil.

If you have a problem area or want to fill the cracks between stepping stones, then do consider this pretty herb. It is sure to be a lovely addition to your gardens.

Happy Gardening!

Garden Gnome
©2007


Wednesday, April 30, 2008

Spring Days in the Garden

Sorry for the lack of posts recently. The reality is the gardens in our new home are proving difficult at best. I'm dealing with horrible soil that is mostly clay mixed with a lot of stone and rock along with inclimate weather. The gardens are at the point where I look at them then get frustrated because I simply don't know where to start. The problem is we really are still in the tearing out phase of an over planted and poorly planted property yet we have to take our time because we want to see what is where in case we want to keep it. So the past few days have involved more tearing out and minimal planting. As long as I can get the existing beds straightened around and my herbs planted this year, I will be a very happy gardener!

Path

Much of the perimeter of our property is lined with evergreens of some type with very poorly planted flower beds. Bordering most of the flower beds are rocks but some of the beds have the black plastic edging. We are ripping out most of the rock and all of the plastic edging. The primary reason for doing so is aesthetics. I really don't like the look of plastic edging and I prefer soft lines over the hard lines of rocks.

The rocks along the side walkway were actually creating a problem by forming a sloped hill that drained towards the foundation of the house. The garden beds themselves are tucked under tall cedars so they don't get a lot of light. The soil (before) was mainly covered with decaying wood chips providing the perfect breeding ground for the huge centipedes that find their way indoors. There were also a lot of mis-plantings and in spots gravel as well as flat shale stones throughout the beds. I made an executive decision that the only way to control the earwigs and centipedes was to slope the bed away from the house foundation and remove some of their habitat. So the bark chips were raked up and all the larger rocks were removed. A fair amount of soil had to be removed as well to get the soil level below the sidewalk.

One problem we have that will have to corrected is indicated by the arrow. A portion of the sidewalk has sunk as a result of erosion from water running from the garden bed towards the foundation combined with a downspout that was allowed to direct water directly to the foundation. While it does add a bit of character, correcting the water problems are our first priority. This water issue combined with current serious sewer issues means I will not be doing a lot of planting in the larger side gardens in case right away in case we have to dig up the sewer line.

Tulips & Daffodiles

Scattered throughout our property are lovely clumps of tulips, daffodiles, crocuses and narcisses. This is one good reason for not disturbing the garden beds below surface if you move into a home before seeing what is in the garden beds. The garden beds here are loaded with these beautiful spring flowers. I was rather surprised to not find any hyacinths! At any rate these are all bulbulous perennials so the rule of thumb is when the flower dies off, leave the greenery. It will slowly turn brown at which time you can then remove it. If your crocuses or other bulbulous perennials break through the grass, do not rush with that first grass cutting of the season. The reason for doing this is the leaves are feeding the bulb for next spring's display of colour.

Revamped Bed

Our house is earth bermed meaning it basically is built into a slope. This makes it very energy efficient to heat but diverting water away from the foundation is critical. I quickly found out that what looks like a flower bed and was planted as a flower bed is not a flower bed. Such is the case of this small bed that originally had two unkept boxwoods and dead rose bushes. A feeble attempt at digging revealed that this area is actually meant as foundation drainage so filled with a few feet (yes feet) of gravel with soil on top. What I wanted here was colour so I settled on creeping thyme with shallow roots that will fill the bed with maintenance free colour while not interfering with the intended purpose of the area.

I dug this bead out about 2 inches below the level of the sidewalk, lower than the iron bar that indicated where the brickwork starts on the house. Then I added fresh top soil and leveled out the bed. I put in three solar path lights that will help light the side of the house then I sprinkled on McKenzie creeping thyme. This is the first time using this product so I will make a complete post on it as soon as I see the results. Creeping thyme is a low growing ground cover that can handle being stepped on, ideal for the location. Once grown it should soften the edge of the sidewalk without being invasive. Unlike English ivy, it is low growing so will not provide a habitat for field mice, something we have had problems with here.

So, that's what has been happening in our gardens. Yesterday one of my kids removed three evergreen bushes and a dilapidated euonymus bush for me so I'm off to work on one of those spots. I'll post about it shortly.

Happy Gardening!

Garden Gnome
©2007


Wednesday, August 15, 2007

A Walk-a-bout the Gardens

Each time I do a walk-a-bout the gardens I discover new plants. I'm excited even though I am sorely missing my main vegetable garden this year. Plans are underway for a late season garden as soon as it cools a bit more at night. I'm hoping to plant towards the third week of August for our zone. In the meantime I've been starting herbs and discovering what is already growing here.

Daylily

Daylilies (Hemerocallis sp.) are hardy, adapatable and rarely bothered by pests. Their showy, trumpet shaped flowers are sure to please. As perennials they are very easy to care for. The only place they do not grow well is near trees. They like full sun, regular water and occasional fertilizing. Deadheading will keep the plants tidy and may encourage some daylilies to rebloom but it not really necessary. Daylilies are propagated by root division every 3 to 5 years.

There are several clumps of daylilies here that won't be able to be identified until they bloom. I suspect at least one will be the common Tiger lily. I have not identified this daylily that is quite similar to Dark Star that is growing in the outer most yard. This daylily is undeniably orange instead of the deep rose of Dark Star. So I will have to do a little research.

Morning Glory

Morning Glories (Convolvulaceae sp.) are my favourite flowering vines so I was delighted to discover a couple of very small vines in the front garden. Spiral shaped buds open to funnel shaped flowers. New flowers bloom daily opening in the morning and dying off by late afternoon. Morning glories can be trellised and used as privacy screens. They will not attach to siding or brick making them ideal flowering vines for the side of houses. Most morning glories in our zone are annuals but these appear to be perennial.

Bird's Nest

There is always something special about discovering a bird's nest. This is the second one I've found since moving here. It is in the branches of a small ornamental tree near the front door. The nest is high enough that I can't see into it but there doesn't appear to be any activity.

We have a nice variety of birds in the gardens. A pair of cardinals visit daily as do several sparrows and house finches. Other identified birds that visit include: Baltimore Oriole, Cowbirds, robins, bluejays, grackles, redwing blackbird, goldfinches, swallows and Northern flickers. There is also a wide variety of water fowl. I haven't seen a hummingbird visiting yet but know they are in the area as are woodpeckers, nuthatches and many more. It will be interesting documenting the various bird species visiting our new gardens.

Happy Gardening!

Garden Gnome
©2007


Sunday, June 24, 2007

Bee Balm


Bee Balm
(Monarda didyma)

Bee Balm (Monarda didyma ) is a hardy perennial herb that is unsurpassed for attracting hummingbirds, butterflies and bees to the garden. It is a member of the mint family. I will be taking a portion of the clump to the new house. M. didyma is a hybrid so is best grown from clump division rather than seeds collected from the plant as plants grown from the seeds will not breed true. I collected seeds anyway just to see what comes up.

Bee Balm grows as tall as four feet high in most soil types including heavy clay. Like most herbs, bee balm prefers a drier soil. It requires part shade to a sunny location. The plant blooms in July and August with flowers that are bright red (M. didyma), white (Wild Bergamot aka Oswego Tea ), purple (M. media, M. citiodora, M. pectinata) or pink colours (M. fistulosa aka Wild Bergamot). It transplants well and the clump should be divided every other year to keep the plant healthy. Bee Balm is an aggressive spreader that is mainly problem free other than powdery mildew and rust. These problems can be controlled using a natural fungicide like chamomile tea sprayed on the leaves and water at the soil level to keep the leaves dry.

Bee Balm is a great herb for the garden as well. It attracts beneficial pollinators like bees and butterflies. It is a good companion plant to prevent attack of subterranian pests for vegetables The oil in the roots of Bee Balm act as a deterrent. The bright red flowers are sure to bring a smile while providing a nice backdrop for other plants.

Bee Balm can be dried then used as a tea, as an aromatic herb for sachets and potpourri or as cut flowers. It is well suited for use in wildflower gardens as well. The original American colonists drank Bee Balm tea to protest the tea taxes. The tea has a strongly minted flavour. To use bee balm as a medicinal tea for headaches and fever as it contains an active diaphoretic (sweat inducer), pour one cup of boiling water over 1 tsp of dried bee balm and allow to steep 10 minutes. Drink at bedtime for insomnia. Bee balm can also be used as a pleasant, minty iced tea in the summer.

Happy Gardening!

Garden Gnome
©2007


Wednesday, June 20, 2007

Lily of the Valley


Lily of the Valley
(Convallaria majalis)

Lily of the Valley (Convallaria majalis) is one of my favourite garden flowers. It evokes pleasant childhood memories and has been in every garden I've created since we were wed. I can remember laying on the cool grass gazing into the glass rocks my mom had surrounded by the heavenly smell of Lily of the Valley. I have a nice sized patch of Lily of the Valley on the north side of this house. While there is a very good chance that Lily of the Valley is already planted at the new house, I will be taking a few plants just in case.

Lily of the Valley is a very popular, hardy ground cover perennial for shady areas in our zone normally planted on the north side of the house but quite often found planted under trees as well. This plant is a slow spreading by rhizomes with fragrant white flowers that bloom in the spring followed by glossy red berries. It is rather problem free but can get leaf and stem rot during the rainy season. Lily of the Valley is a medicinal herb used as a cardiac tonic and antidiuretic similar to Digitalis. Pips, flowers and berries are poisonous so be sure to supervise children if you have Lily of the Valley growing in your garden.

Happy Gardening!

Garden Gnome
©2007


Friday, June 15, 2007

Trumpet Vine


Trumpet Vine
(Campsis radicans)

Years ago when we bought our second house there was a vine growing up the south side of the house. This was an old, turn of the century, wood sided, two storey house in need of tender loving care. We were young and naive so tackled the job that ended up being an almost 12 year project. We did everything from designing a huge kitchen, re-roofing, siding, new wiring, new plumping, refinishing wood, installing a pool with large two level deck and privacy fencing. Finally we tired of our money pit and sold it for a non-descript subdivision house with no character but minimal work. We are now moving into house number five and a bit wiser but back to the vine.

I thought the vine was beautiful. It was a bright green and shaded a good portion of the southside wall in the summer. It never flowered in that location as my husband ripped it out because it was damaging the wood siding. We found remnants of the vine under the second story siding coming through the wall when we did the wiring! I salvaged a few pieces, set them in water to root then planted them along what was then a chain link fence. By the time we put in the privacy fencing the vine had grown considerably so I decided to leave it to soften the look of the fence despite my husband's protests. I was rewarded with beautiful deep orange trumpet shaped flowers. A few years later when we sold, the vine had covered a good portion of the fence and was pushing some of the fence boards loose. My husband declared it a weed worthy only of Round-up but it was too late, I had already fallen in love with this beautiful vine.

After we moved, I was at the nursery looking for plants when I discovered the same vine except it had yellow flowers. It was a trumpet vine (Campsis radicans) so I bought it much to my husband's dismay. I had strict orders not to plant it anywhere near the house! I brought a piece with me when we moved here and planted it by the old garage now being used as a garden shed. The vine is growing nicely but hasn't flowered yet. I'm taking a few cuttings with me to the new house.

The trumpet vine is a low maintenance, fast growing and spreading vine that is ideal for privacy screening. It is pest free and fairly drought tolerant. In fact, this is one vine that lives on neglect. It transplants easily and new vines can be grown from cuttings. The beautiful trumpet shaped flowers attract hummingbirds, wasps and bees all of which are beneficial pollinators in the garden. Unfortunately, the trumpet vine can be invasive and should not be planted against houses or other buildings. It is best if contained somewhat to prevent the invasiveness. So becareful where you plant this vine. The trumpet vine can cause rashes for some people so gloves should be worn when handling the vine. Propagation can be through cuttings or air layering.

Happy Gardening!

Garden Gnome
©2007


Thursday, June 14, 2007

Snow-in-Summer


Snow-in-Summer
(Cerastium tomentosum)


My mother-in-law introduced me to Snow-in-Summer when we bought our first house over twenty years ago. Since then I've grown this low growing ground cover with dusty green foliage and pretty white flowers at every house we've owned. This move will be no different.

Snow-in-Summer is a very easy to grow, low maintenance perennial. It is undemanding and will grow in most soil and light conditions. This plant is invasive so needs to be contained by borders if you want to use it as a border. Otherwise, let it spread. Snow-in-Summer blooms late spring to early summer. I propagate by dividing the rootball then planting the second clump where I want or in a pot for moving. I keep the soil moist but not wet until the new clump has rooted and shows signs of new growth then water as normal.

I've only encountered minimal problems with Snow-in-Summer. Unless the clump is dense, weeds like quack grass can root within the Snow-in-Summer. The easiest way to deal with this is manual removal until the clump gets dense enough to strangle out weeds. If the Snow-in-Summer is planted where leaves will fall on it during the autumn, remove the leaves. If you don't, the leaves will cause the plant to die off. The biggest problem I had with this plant at one house was our cat who decided the Snow-in-Summer made a nice bed for him. Now this cat was a heck of a lot more determined to get his way so finally I gave up. Aside of the perpetual indent made by the cat, the Snow-in-Summer thrived and spread. This is one plant I'm looking forward to growing in my new gardens.

Happy Gardening!

Garden Gnome
©2007