Neighbours talking over the garden gate has long been a tradition. They share gardening tips, complain about the weather and pests yet are ever eager to discuss their gardens. That is what I had in mind when creating this blog. So stop by my garden gate to find out the latest happenings in my garden.

Happy Gardening!

Garden Gnome
"All my life through, the new sights of Nature made me rejoice like a child." ~ Madame Marie Curie"
Showing posts with label houseplants. Show all posts

Thursday, January 02, 2014

Gardening in 2014

Looking back on my gardening endeavors of 2013, they were little more than a disaster!  We spent a lot of time ripping out with the only real progress being the new side and front garden beds with only the base completed and no actual plantings.  I must say, the rock looks gorgeous though!  We learned a lot though in 2013. 

We know we want to move to very low maintenance for the ornamental gardens.  We have the the plans set for how we want the backyard so are ready to move ahead as soon as weather permits.  This year's garden plans involve small space gardening, high intensity gardening, vertical gardening, container gardening and growing indoors.  I will be starting the indoor garden this week, something that really couldn't be done while we were at our vacation home for October, part of November and most of December.  At any rate, I already have a few herbs growing indoors so I'll start with more herbs and go from there.

Things look promising for a lovely gardening year ahead...


Sunday, February 26, 2012

Pothos (Epipremnum)

Pothos (Epipremnum) is a beautiful, low maintenance house plant that with white or yellow variegated leaves, or the leaves can be solid green.  It is commonly called devil's ivy or variegated philodendron.   My pothos is about 10 years old.  It grew nicely until we moved to our last house where no plants wanted to grow indoors.  I struggled for 4 years to keep him alive and I do mean struggle.  When we moved here, the pothos started to perk up much to my delight.

pothos in self-watering pot
I repotted the pothos in an EZZY-GRO  self-watering planter then moved him into the entrance way.  This is a bright location with lots of natural light thanks to side lights on the door, an arched window above the door and a beautiful southern exposure.  I added a bit of liquid fertilizer into the reservoir just for good measure.  I took this picture two days after repotting and could not believe the difference.

The depth of the green has been very much enhanced.  Although there are signs that more recovery is needed, it is obvious that my pothos loves his new planter and location.  Each day there are more signs of improvement so I am quite happy!

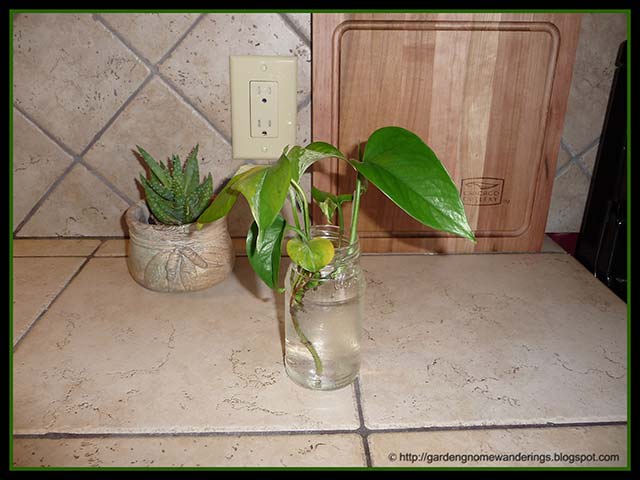
pothos clipping
When I was repotting the pothos a piece accidently snapped off.  I immediately popped the piece into a jar of water for rooting.  Pothos propagates nicely using the water method or you can stick the cutting into a pot of vermiculite.  If you use the vermiculite method, use a bit of StimRoot® #1 for softwood cuttings.  This is a hormone that stimulates root production.  Either way, the cutting will develop roots.  Once the roots are about 2 - inches  long, the cutting can be potted in soil.  

When my pothos is back to full health, I will start making a few more clippings.  This will give me a few more plants while encouraging new growth on the parent pothos.  In the meantime it is a bit of TLC for the pothos.

Happy Gardening!

Garden Gnome
©2006-2012


Sunday, February 19, 2012

Repotting Houseplants and Starting Seeds

It's that time of year!  Spring is just around the corner and with our ADLF quickly approaching it is time to start seeds.  I have been busy repotting all of my houseplants into self-watering pots.  I really do like the pots!  The larger self-watering pots for the floor plants are only $7.47 at Wal-Mart which is rather inexpensive compared to some of the regular pots that size (12 - inch).   I used the smaller 7 - inch self-watering pots from the dollar store ($1.25 each) to repot all of my indoor herbs.  My indoor herb collection is lower than I would like.  I currently have two pots of parsley, oregano, lemon thyme, sage, sweet basil, 2 pots of rosemary, and mauve garlic chives.

I am rather pleased that all the geraniums I brought with us when we moved survived!  One of the local schools sold geraniums last year for $3 each which is more expensive than the nursery or other stores but it was for a good cause.  I bought ten to pop into window boxes without actually planting the boxes for instant splashes of colour while the house was on the market.  I used the same size (12 - inch) self-watering pot to transplant three geraniums into each one for two matching planters for the front porch.  That leaves me a total of eleven more geraniums to transplant. 

I also used the same size self-watering pot to repot the Hibiscus that survived the move.  Wal-mart had them on sale for $5.  I bought two of them to pop as is into tub containers on each side of the front door when the house was on the market.  Once the house sold, one went to my husband's office then made it's way to our new house.  The other came directly to our new house where it sat on the deck.   I brought it in as soon as the temperature started dropping as the Hibiscus only tolerates temperatures above 50ºF.  The one that had been at the office was barely surviving so I wasn't surprised when it looked dead after a brief cold spell.  It is still on the deck as I was curious whether it would come back in the spring.

Our ADLF is April 15 so this is the time to start some herbs, tomatoes, peppers and ornamentals.  I did a bit of seed shopping.  My goal this year is to grow as much as possible from seed rather than buy plants but I know I will still buy plants because I can't resist.  I started purple basil, lemon basil, sweet basil, thai basil, cinnamon basil and lavender in individual greenhouse pots.  These are rather neat so I will talk more about them tomorrow.  I bought a 72 cell greenhouse starter kit that will be used for starting tomato, peppers and a few ornamentals.  'Tis a busy time but a rather pleasant way to spend a bit of time while visions of my new gardens dance through my head :)


Happy Gardening!

Garden Gnome
©2006-2012


Saturday, February 18, 2012

Talk to Your Plants

Years ago as a newlywed way back when terrariums were all in vogue there was a movement encouraging talking to your plants to stimulate healthy growth.  Some likely thought that this idea was a sure sign of an unhinged gardener heading to the confines of a padded cell but you know talking to plants has a lot of merits.  I talk to my plants even name some of them.  The benefits of talking to plants is two fold.

First, talking to plants establishes a firm connection between home gardener and the plant.  It is purely psychological for the home gardener but it can a huge physiological effect.  In fact, in some psyc wards of hospitals plants are encouraged for their healing effects psychologically.  Caring for a plant gives a patient a reason to live and much like some pets a plant is never judgmental, but totally reliant on the care it receives.  With proper care and nourishment, a plant will flourish rewarding the care giver with beautiful lush growth.  Living plants in any environment breath life into that room.  They help to purify the air while bringing a smile. 

Plants grown outside give the grower much needed exercise, exposure to the sun which translates into the natural production of Vitamin D, connect the grower with nature and help to lower blood pressure while reducing cholesterol levels.  Even puttering in a garden if only a balcony garden for 15 minutes a day can reap huge rewards physically!  Gardening is a great stress reducer that naturally helps your body relax.  It is only natural at some point to start talking to plants when they have this much effect on your life.

Second, there is actually the science behind talking to plants.  Humans breath in oxygen and produce carbon dioxide.  Plants use carbon dioxide through photosynthesis to produce oxygen which really explains why humans and plants need each other.  Talking to a plant gives that particular plant a little boost of carbon dioxide.  Much like giving a plant extra nutrients via fertilizers, the carbon dioxide will help in the photosynthesis cycle which results in a healthier plant.  And the plant doesn't even care if you have bad breath as long as you give it the carbon dioxide it wants.

So go ahead and talk to your plants.  They will listen then reward you with beautiful, lush growth.  Heck I even name some of my plants but that is another story...

Happy Gardening!

Garden Gnome
©2006-2012


Monday, February 13, 2012

Using Fertilizers

Yesterday I discussed what fertilizers are and understanding the numbers on the label.  If you recall, fertilizers are either organic or inorganic and are labeled with the N-P-K content but some may also include the S content in the form of N-P-K-S.  It is important to choose a fertilizer based on the plant's needs.  If you want a nice, bushy plant with lush greenery, choose a fertilizer high in nitrogen (N) content.  If you want a plant with good fruit development and a strong root system, choose a fertilizer high in phosphorous (P).  If you want a plant with beautiful, showy flowers, choose a fertilizer high in potassium (K).  Don't forget the importance of the other three macronutrients (calcium, magnesium and sulfur) or the micronutrients boron, chlorine, copper, iron, manganese, molybdenum and zinc.

Fertilizers are available in liquid and granular forms.  You can also buy pressed fertilizer spikes that are pressed or pounded into the soil.  Liquid fertilizers feed the plants upon application so need to be reapplied at regular intervals.  Pressed fertilizer spikes and granular fertilizers are slow release fertilizers.  Once applied they will feed the plant then slowly release fertilizer for a couple of months continuously feeding the plant each time it is watered.  There are benefits to using either.  Soil amendments like compost will also continuously feed the plant as they continue to break down.  If you are busy or are away from home for extended periods, the slow release fertilizers will keep your plants healthy without the extra attention.  If you use self-watering planters, liquid fertilizers will achieve the same goal when added to the reservoir water making your container plants very low maintenance. 

The use of inorganic fertilizers can cause the depletion of micronutrients (trace minerals) in the soil.  This is more of a concern for those growing in traditional garden beds.  Some soil amendments (eg. mulch, compost, leaves) are great inexpensive fertilizers.  Fish or manure tea is a wonderful, inexpensive organic fertilizer for container plants.  Other soil amendments (eg. manure, straw) are also good but can cause problems.  For example, manure can cause fertilizer burn if applied heavily and straw will introduce more weed seeds than any home gardener wants to deal with.  Fertilizer burn also occurs due to over fertilizing.  Leaves will brown and in some cases the plant will die.

I personally prefer to use organic fertilizers on all edible plants.  I do use inorganic fertilizers on ornamental plants and houseplants grown in containers but use organic fertilizer for any ornamental grown in actual garden beds.  I use organic oil amendments like compost in my container plants both indoors and outdoors.  When I plant tomatoes and peppers I always add epsom salts (magnesium sulfate) to the hole then monthly thereafter and I use epsom salts for my plants in containers.  I also use organic or inorganic fertilizers for all plants I grown hydroponically including clippings being rooted in water (eg. impatiens, tomatoes, pothos, ivy) with organic fertilizer used for all edible plants.

Fertilizer should be applied every two to four weeks, bi-weekly for container plants including raised beds and weekly if growing hydroponically.  You can fertilize every time you water especially for container plants.  In this case, you use a very dilute fertilizer solution.  You can also use soil amendments that will continuously feed your container plants.  Do not fertilize if using a potting mixture with a time released fertilizer or on a newly purchased plant with a time released fertilizer in the soil.  A slow release fertilizer can be recognized by the appearance of small round balls that will be green, white or brown.  If a plant is diseased or is infested, treat first then fertilize lightly.  Fertilizing will help the plant recover.  If you are using self-watering planters, add a dilute fertilizer solution to the reservoir

Never fertilize a plant in dry soil!  The thirsty plant will take up too much fertilizer when watered causing damage to the roots and fertilizer burn.  When applying any fertilizer with the exception of mulches, compost and leaves always water first then apply the fertilizer to prevent fertilizer burn.  Don't over fertilize but in the event if you accidently over fertilize a plant in a container, flush with clear water to help remove the excess fertilizer.  This will minimize the damage but you can still expect a bit of damage to the plant. 

Happy Gardening!

Garden Gnome
©2006-2012


Saturday, February 11, 2012

Tips for Using Self-Watering Planters

Using self-watering planter for houseplants, on the patio or deck and in the garden makes a lot of sense.  They result is healthier, stress-free plants that are better equipped in warding of disease and infestations.  I have been busy repotting all of my houseplants and starting planted pots for outdoors using self-watering planters.  Here's a few tips for using self-watering planters:

  • size of self-watering planter  - If repotting a plant, choose a size of self-watering planter about 1" to 2" diameter bigger than the pot the plant is currently in.  For example if the plant is in a 4" pot, choose a 6" or 7" self-watering planter. 
  • soil - Use a good quality potting mix or mix your own using sterilized soil, vermiculite, and peat moss.   The soil should be light and fluffy but with a bit of body to it.
  • fertilizing - By the time most plants need repotting, they are a bit stressed.  Use a fortified (.14-.14-.14) potting mix for non-edible plants or fertilize after repotting.  Organic fer
  • watering - Do not water or fill the reservoir before placing the plant where you want it!  Place the potted plant on a plate, charger or floor protector.  The reservoir can overflow if filled beyond it's capacity.  Place the plant in a manner that there is easy access to the reservoir fill hole.  Water the plant from the top until the entire soil surface is wet.  Let the plant sit for 15 minutes before filling the reservoir.  This allows any excess water to go into the reservoir and helps to prevent overflowing.  Use a small curve spout watering can to fill the reservoir.  If the reservoir has a float system, stop filling when the float pops up.  If the reservoir does not have a float system, use your finger as a guide to fill until the reservoir hits your finger just slightly below the opening.

Happy Gardening!

Garden Gnome
©2006-2012


Friday, February 10, 2012

Why Use Self-Watering Planters?

There is a wide range of self-watering planters available or you can make your own.  Basically a self-watering planter consists of two chambers.  The upper chamber is the potting chamber.  There is a series of slits in the bottom of the upper chamber allowing water to be drawn from the lower chamber (water reservoir) by the plant roots using capillary action.  There is some type of hole at the top of the lower chamber where you can add more water as needed.  Inexpensive versions consist of the two chambers but more expensive versions have a water float in the reservoir and some type of wick on the bottom or even going up the side of the upper chamber. 

It is also quite possible to make your own self-watering planters.  There are many, many designs and instructions available online to suit every need.  When it comes to houseplants and smaller patio plants, the purchased self-watering planters are likely less expensive than homemade but larger containers (eg. plastic totes) used to grow vegetables on the patio are less expensive if you make them yourself.  The question is, why should you use self-watering planters?  Here are a few of my reasons:

  • healthier plants - Self-watering planters eliminate over watering and drying out.  The moisture is consistently provided as the plant needs it so plant stress is greatly reduced.  
  • fewer infestations and diseases - Healthier plants ultimately means fewer infestations (eg. aphids, white flies)  and diseases (eg. fungus, dampening off, leaf mold).  While this is less of a concern indoors, it can be a problem for any container plant grown in the garden, on decks or patios.  A healthy plant can tolerate an infestation better than a stressed plant.
  • reduced time watering - If you have houseplants in every room of your house as you should as well as container plants outdoors you can easily spend an hour or so water plants each week.  Each self-watering planter reservoir holds enough water to water the plant for 2 to 4 weeks.  Instead of watering houseplants every other day or every week, the timing is cut in half to a quarter by using a self-watering planter. 
  • plant friendly - The reality is most home gardeners water according to their schedule not on the plant's schedule.  A self-watering planter keeps the soil moist as needed but doesn't over or under water. 
  • easy fertilizing - All container plants require fertilization on a regular basis because they deplete the soil nutrients quickly.  Simply use an organic liquid fertilizer added to the water in the reservoir.  The plant will use it as the nutrients are needed without the fear of fertilizer burn.  
  • worry free - One of the biggest concerns anyone who grows plants in containers, indoors or outdoor is what to do when you go on away for an extended period of time.  I know I have called family on more than one occasion when we decided to stay away longer than expected asking them to check my container plants because I couldn't remember if I had watered them before we left.  I have an excellent network of family and friends to come to my rescue but not everyone has this.  The self-watering planters remove this worry.  As long as you keep water in the reservoir you know your container plants will be fine for 2 to 4 weeks.  This will be a huge relief for those growing on patios too as patio plants can dry out quickly on a hot day.
Happy Gardening!

Garden Gnome
©2006-2012


Thursday, February 09, 2012

Arboricola Bush in EEZY-GRO Self-Watering Planter

arboricola bush in EEZY-GRO self-watering planter
Arboricola Bush
(Umbrella Plant)

One of our local grocery stores was selling gorgeous floor plants in 10" pots for $9.99 so I bought a few.  Plants breath life into a room but at the same time help clean the air so they should be included in every room of the house.  Floor plants are wonderful for adding that extra touch without spending a lot of money. Pictured is the Arboricola bush I bought then repotted in and EEZY-GRO self-watering planter.

We are away from home for extended periods of time when we are at our vacation home.  Our last house was in a rural location with no access other than secondary roads that are not plowed out as fast as the main roads.  Rather than ask family and friends to come out to water my houseplants I turned to using automatic watering globes.  The local dollar store sells the smaller ones 2/$1.25 and the larger ones at $2 each.  I've been using them over a year now as an inexpensive yet effective alternative for keeping houseplants watered.  There are three downsides to the watering globes.  First they are made of glass so breakage is always a concern.  The second downside is potential overheating if used outdoors and the final downside is at best a filled water globe will provide water between 5 and 8 days, or at least that has been my experience.  I am moving towards self-watering planters for all of my houseplants and will be using them for various container plants in the garden and on the decks.

I was at Wal-Mart a couple of weeks ago checking out their houseplant selection.  I decided to try an EEZY-GRO self-watering planter.  These planters are made by Apollo Plastics Ltd.in Mississauga, Ontario.  There is a water reservoir on the base of the planter and a wick on the bottom of the planter.  Once the plant is potted, you water the top as you would normally.  Then you fill the water reservoir through the opening.  There is a small float device just inside the opening.  The plant roots draw water up through the roots using capillary action as needed.  The planter is designed in such a manner that the roots are not constantly standing in water making this an ideal planter for patio plants.  This planter is designed to water the plant for 2 to 4 weeks depending on the conditions.

The EEZY-GRO self-watering planters are available in limited range of colours but should meet most gardening needs.  There are versions available for hanging plants as well.  I paid $7.49 for the 14 - inch diameter pots and $6.49 for the 7 - inch diameter pot.  In perspective, if these pots keep my houseplants happy and healthy while reducing the number of times I have to water as well as eliminate the danger of potted plants drying out, it will be money well spent!

Happy Gardening!

Garden Gnome
©2006-2012


Monday, October 24, 2011

Boston Fern (Nephrolepis exaltata 'Bostoniensis')

Boston fern
Boston Fern
(Nephrolepis exaltata 'Bostoniensis')

I have had a Boston fern in every home we have had.  My oldest Boston fern was acquired during our early newlywed days, moved with us from Ontario to Alberta and back, then graced our first four owned homes.  It had a long, long history and really was more like a family member.  I was devastated when it failed to thrive at our last house.  As mentioned earlier, that house had serious bad karma with respect to houseplants! 

I bought a new Boston fern for my office at our new house.  It sits in the corner where I can enjoy it while on the computer.  Boston ferns are an age old low maintenance plant that graced the parlors of many a home.  This is a medium light plant that does well in filtered to partial sunlight.  A trick I learned eons ago was to water my Boston fern wih a little milk.  By little I mean putting a bit of water into an empty milk bag then water the fern.  Done once a month and this little tip will keep your Boston fern happy and healthy.  The second trick with Boston ferns is humidity so mist the foliage  couple of times a week.  The foliage will fade if the plant is not getting enough water.  Keep the soil most.  I'm using a watering globe to make sure the fern gets the right amount of water that it needs.

Happy Gardening!

Garden Gnome
©2006-2011


Sunday, October 23, 2011

Houseplants and Watering Globes

Dollarama is likely quite happy with me!  I discovered their watering globes back in May of 2010 and have been experimenting with them ever since.  We spend upwards of five weeks at a time away from our permanent residence to enjoy our vacation home.  That leaves the dilemna of houseplant watering.  In our case, this is not a huge issue as our kids look after the house while we are away but I'm working on re-establishing my extensive houseplant collection in our new home.  Watering globes make perfect sense!

The watering globes I'm buying come in two sizes with the large one costing $2 and two of the smaller ones costing the same price.  The watering bulbs will keep each plant watered up to two weeks.  That means instead of the kids having to water my houseplants weekly they will only need to refill the watering bulb once during a four week period.  This is a lot less work for them!  There will still be a few trays of houseplants that will need to be watered individually but for the most part the watering the kids will need to do will be minimum.  Next I will be working on a self watering DIY system for my houseplants.  That way they will be rather self sufficient when we are away!

Happy Gardening!

Garden Gnome
©2006-2011


Saturday, October 22, 2011

Mother-in-Law's Tongue (Sansevieria)

Sansevieria


Sansevieria


Sansevieria is commonly called Mother-in-Law's Tongue.  It is a good air purifier that removes toxins such as formaldehyde, xylene and toulene all of which can occur in homes with laminate flooring, panelling, other manmade wood composite building materials, carpeting and upholsteried furniture.  The release of these chemicals is known as off-gassing, something quite common in newer homes. 

We have a lot of laminate flooring in our new home so I am being careful to include plants that act as air purifiers.  I bought a Sansevieria for our bedroom.  This plant, despite the benefits to indoor air quality, lives on neglect.  It prefers low light conditions, temperatures about 50ºF and moist soil.  Sansevieria is recommended for offices, bathrooms and other low light living areas.  Our bedroom has a northwest facing window so there is light but it is not a bright light.  I'm using a watering globe to ensure the plant doesn't dry out.  Other than that it is a very tolerant, low maintenance houseplant.

Happy Gardening!

Garden Gnome
©2006-2011


Wednesday, October 19, 2011

My First New Houseplant at Our New Home

palm houseplant
First New Houseplant at Our New Home
October 12, 2011


The beauty of houseplants is aside of adding life and vitality to a room while softening the hard edges of the room is they can be used to camouflage those little room idiosyncrasies that can be a bit annoying.  When the Bell satellite television installer ran our lines he made the assumption we would place the television in the corner thus hiding the large switch box.  The problem was there was no furniture in the room.  We want the television on the end wall, not in the corner so my husband straightened the wires then we did a bit of camouflaging with an endtable and larger plant.

The main television room is open to the dining room so it can carry a larger plant nicely.  A couple of the local stores have houseplants on sale so I've been taking advantage of the sales buying houseplants as I find a spot for them.  The first houseplant I bought was this beautiful tropical.  It is in the palm family but did not have a tag for positive identification.  The palm is about three and a half feet tall.  It  does just what it was intended to do, looking quite happy in it's new home.  Now I need to find a nice decorative pot for the palm to sit in.

Happy Gardening!

Garden Gnome
©2006-2011


Tuesday, October 18, 2011

Houseplant Problem at Our Last House

I have always had an abundance of houseplants in every home we've lived in.  I do mean an abundance too, with houseplants in pretty much every room.  Houseplants are a wonderful natural way to soften a room, bring interest and life into a room and improve air quality.  Our last hose was horrid for houseplants and yet I never did figure out what the problem was.  I honestly believe the house was veiled in bad karma!

We moved into that house in June of 2007.  Every houseplant I brought with us and there were a lot, was dead within three weeks with the exception of my variegated pothos.  Even the poor pothos looked like it was struggling though.  I lost my beautiful Boston fern, asparagus fern, several African violets, all of my indoor herbs and even the potted English ivy.  I spent close to $100 replenishing my houseplants figuring there was something with the move that affected the houseplants.  Within the following three weeks most of the new plants were dead.  Over the next four years, every single houseplant I brought into the house died while the poor pothos continued to struggle.  I brought in tomato plant clippings and herbs from the garden.  It was a struggle to keep them going throughout the winter at that house and yet I had been doing that successfully for years in our other houses.  I started cacti seeds from Nevada brought back from our spring vacation in 2008.  They germinated and survived but were struggling as well.  Of the four springs that I started seed trays, the majority failed.

It was not for lack of effort.  I tried to troubleshoot.  There were no signs of insect infestation or fungal problems in the house.  I used chamomile tea to ward off any dampening off for seedlings, fertilized houseplants, moved them into the sunporch during the nicer weather, nippped and tucked them, supplemented with plant lighting and still the houseplants failed to thrive.

We started moving in here September 1 of this year.  I brought the struggling potos and cacti, a sad statement of how bad that house was for growing houseplants.  Within a week both were looking quite healthy!  I went houseplant shopping, picking up a few here and there whenever I had to go shopping for something else.  It has been a little over six weeks now since we started moving in and the houseplants are looking marvelous.  I can't wait to share what I bought with you, the reader!

Happy Gardening!

Garden Gnome
©2006-2011


Tuesday, July 20, 2010

Waterball Garden Update

waterball garden update
Waterball Garden Update
July 16, 2010

Last month I posted on setting up a waterball garden using polyacrylamide decorative gel.  The waterballs had a wonderful, whimsical look so I used them to set up three vases of cuttings.  The gel works well and I have no complaints as far as starting non-edible plant cuttings.  They are quite pretty at first.  Pictured to the right are the crystal balls fully hydrated, shimmery and quite appealing.  Pictured to the left is one of the vases planted with pothos cuttings.  Cuttings need suitable light for rooting.  Within a couple of weeks the waterballs started discolouring with signs of algae.  By the time good roots were forming the waterballs were not as aesthetically appealing as they could be.  I plant on planting the rooted cutting in soil then will clean the waterballs through a series of fresh water washes.  I will use them again for rooting but in all honesty I think the waterballs are better for short term, fresh plant use for centerpieces and decorative elements.  I do like that no watering is necessary during the rooting period though so while the waterballs don't keep their great crystal looks while rooting they are still rather useful.

Happy Gardening!

Garden Gnome
©2006-2010


Tuesday, July 06, 2010

Watering Globe Update

I posted back in mid-May about the automatic watering globes I bought.  I thought these would be a nice water management tool especially for indoor use.  I've had a chance to use the watering globes for almost 2 months now so thought I would report back on my experience.   The watering globes are very easy to use.  You simply fill them then insert into the planter.  However I did find that the soil can sometimes block the spout preventing the proper release of water.

I think the jury is still out on the watering globes.  The pothos is loving it's watering globe!  The leaves are bright and shiny, looking very healthy and growing in leaps and bounds.  Speaking of bounds this plant likely does need to be repotted as I am sure it is root bound.  I took a few clippings to start more pots of pothos.  As a houseplant it is rather problem free thriving on neglect.  The watering globe has made a huge difference in this plant!  The calla lily even though it likes to be kept a bit on the damp side is another story.  Shortly after putting the watering globe in I noticed the soil developing signs of mold.  I replanted the the lilies thinking that the pot was too small.  I added the watering globe to the newly planted lilies and put them in the sunporch.  What I think is my problem with these lilies is they weren't getting enough sunlight on the lower level of the house.  The sunporch is on the upper level so there is a bit more natural light as well as better air circulation to help the soil dry between watering.  The watering globe does keep the calla lily watered but I'm wondering if it is just a bit too much for the current conditions. 

All in all I am rather pleased with the watering globes.  They will certainly help prevent plant loss for those times we are away for extended periods of time.  They will also help keep plants watered during the drying winter heating months.  I am planning on picking up a couple more for use with houseplants as needed.  I think they are well suited to tropic house plants that require a bit more waterings.

Happy Gardening!
Garden Gnome
©2006-2010


Friday, June 04, 2010

My Waterball Garden

[Please note that this is not a paid post.  I am not being compensated by JM Chemicals but rather sharing a neat product I found with you.] 

We went to a couple of fleamarkets while on vacation.  It's a great way to spend the morning and  you never know what you will find.  Quite often there is one or more booths selling plants and there are always a few booths selling fresh local produce.  Well there you go fresh produce and plants in one location so how could you go wrong?

dehydrated waterballs
One booth we stopped at was selling Deco Beads aka waterballs in various colours.  The display was quite pretty so I ended up buying a large package of the very small crystal beads.  Waterballs are made by JM Chemicals.  SoilMoist™is a non-toxic, environmentally friendly polymer that stores water then releases it to the plant as needed essentially acting as a water reservoir.  The waterballs are the decorative form of SoilMoist™ meant for a variety of decorating purposes from water plantings to centerpieces with flowers and/or candles.  Unlike SoilMoist™ that must be incorporated into the soil at the root level of the plant, the waterballs are meant to serve a decorative function.  JM Chemicals has a wide variety of products to help with the home gardening watering needs.

The SoilMoist™ polymers reduce your plant waterings by 50%, reduce transplant shock is effective in the soil for 3-5 years. They are an effective water management aid that is ideal for interior and exterior plantings.  I can immediately see the usefulness for container gardening.  While the company says these polyacrylamide crystals can be used for  vegetables but there are some concerns that when the polymer starts to breakdown they release acrylamide a known neurotoxin and possible carcinogen.  For that reason I will not be using any form of these crystals in my edible garden beds or planters although commercial growers and other home gardeners are using them for edible plants.  I think they will be quite useful for the decorative funtion indoors as well helping with water management for my outdoor flower planters and houseplants especially when we are away from home.


partially hydrated waterballs
I have to say these beads are really interesting to watch.  Mine did not come with instructions so I poured the contents of the small bag into a large stainless steel mixing bowl.   I poured a couple of cups of water over the beads then waited patiently (or not so patiently).  About an hour later this is what the waterballs looked like.  There was still a fair amount of water in the bowl so I just left it thinking that perhaps the waterballs weren't going to work.  However after another hour the water was all absorbed so I poured more water over the plumping little waterballs.  By late evening the water was once again absorbed so I covered with more water and left them until the following morning. 

fully hydrated waterballs
In the morning all the water was absorbed with the middle section of the waterballs in the bowl indented so I poured in more water to cover.  By lunch time the waterballs were ready to use.  I was quite impressed by how much the waterballs had increased in size!  Each was now about the size of a marble that glittered and sparked everytime the light caught them. 

The real trick seemed to be over saturating them with water then giving them the time to absorbe the water.  I used a large slotted ladle to scoop the waterballs into 4 clear glass vases for planting.

waterball garden
As I filled the vases I wondered what to plant in them.  I figured they would be perfect for rooting cuttings and a bit prettier than a plain jar of water plus the waterballs would keep the cuttings upright with no further supports.  I made a couple of cuttings from my pothos plant that really does need a bit of trimming and a couple cuttings of English ivy, periwinkle and another smaller unidentified vine from the outdoor gardens.  These are outdoor plants I like but in controlled areas.   Once the plants are rooted I will pot them in soil with SoilMoist™ crystals added.  I set the planted vases in a couple of windows.  I really do like how the waterballs glisten and glitter!

I have these containers out of the reach of little hands.  The waterballs would be something any child would love playing with.  They are definitely on the textural side of things similar to wet gummy bears but not as sticky.  Even I loved the feel of running my hands through them!  I will be experimenting more with this type of soil-less potting medium.  For any plant left in the waterballs at some point a fertilizer will be needed but that would be the same as any plant left in a jar of water.  I can see lots of geranium cuttings lining my window sills this winter!  I have already ordered the non-decorative crystals for my flower pots and houseplants so hopefully they will be and effective part of my water management strategy during extended periods when we aren't home.

Happy Gardening!

Garden Gnome
©2006-2010


Tuesday, February 09, 2010

Tropical Dome at The Mitchell Park Conservatory

If you have been following this blog you will know that I have highlighting our visit to the Mitchell Park Conservatory (The Domes) in Milwaukee, Wisconsin. The last dome we visited was the tropical dome. Unlike the show and desert domes, the tropical dome was blissfully warm and humid. It was wonderful walking through enjoying the sights and sounds. Many tropical plants make wonderful houseplants where the growing conditions can be controled. I'm always drawn to the plants that I can't easily grow at home indoors or outdoors.

zebra plantZebra Plant

The Zebra Plant (Aphelandra squarrosa) is a woody shrub native to Brazil. It is named for the white veins on the dark waxy green leaves. The zebra plant became a houseplant during the Victorian era when growing tropical plants indoors became popular. When used as a flowering houseplant it grows well in moderate to bright filtered light. It does best with higher humidity so either mist regularly or place on a rock humidity tray. The plant has a lovely yellow spike when in bloom as pictured but it can sometimes be difficult to get to bloom as a houseplant. The flower will last for several weeks.

grapfruitGrapefruit

I love citrus trees! At one time years ago I had a small ornamental citrus tree as a houseplant. We've visited Florida several times. The citrus groves are amazing to see but even better but seeing citrus trees growing in backyards is just pure envy. I would have a field day!

I really liked that the conservatory had several temporary signs to draw attention to various plants in bloom or setting fruit so you wouldn't miss them. Looking up the grapefruit tree sure enough there were several nice sized but green grapefruits. Aren't they gorgeous?

Neem

The Neem Tree (Azadirachta indica) is a fast growing evergreen native to India. It certainly earns its reputation for being nature's drugstore. Products of neem tree are widely used in traditional Indian medicine (Ayurvedic)and have proven medicinal properties including being anthelmintic, antifungal, antidiabetic, antibacterial, antiviral, anti-fertility, and sedative. Neem oil is pressed from the fruit and stems of the Neem Tree. It is used for cosmetics and skin care as well as being an effective mosquito repellent. Neem gum is used as a bulking agent and for diabetic foods.

carob treeCarob Tree

The Carob Tree (Ceratonia siliqua) is native to the Mediterranean that grows well in dry climates. The bright, shinny unripened green seedpods are about 5-7 inches in length resembling green beans. They darken to almost pure black becoming somewhat withered when ripe. The edible seeds inside the pod can be eaten as is or ground to use as a chocolate substitute, flour, molasses and alcohol. The seed yield a tragacanth-like gum (manogalactan), called Tragasol an important commercial stabilizer and thickener used in may food products including baked goods, ice cream, salad dressings, sauces, cheese, salami, bologna, canned meats and fish, jelly, and mustard. Once the gum is extracted the seed residue is made into a starch- and sugar-free flour of 60% protein content for diabetics.

Happy Gardening!

Garden Gnome
©2006-2010


Wednesday, March 14, 2007

Let the Fun Begin!

It's that time of year folks! Time to get all the seed packets in order, start seedlings indoors and get your hands dirty. It's also a good time to rejuvenate and start houseplants. Let the fun begin!

Seeds Everywhere!

I admit it, I'm just a little behind on starting my seeds indoors but only by a few days. Yesterday was sunny and a balmy 63ºF so that spurred me into action. Unfortunately the prediction is for colder temperatures for the rest of the week with chance of snow flurries. It is March so anything can be expected.

This was the condition of my dining room table yesterday. There were seeds everywhere as I sorted them into various piles. I plant according to the average day of last frost (ADLF) so some seeds are started indoors six to eight weeks before the ADLF while others are planted directly in the ground. Towards the upper corner is my gardening journal for the past year. I cull out the seed packets based on the performance noted in my journal. There are also several zipper sandwich bags holding various seeds I collected. Just barely visible on the chair to the right is a large plastic bin holding various collected seeds as well.

Just Beginning

My biggest problem for starting seeds indoors is space. We don't have a basement or spare room and the house is spatially challenged as it is. So despite my decluttering goals in preparing for spring cleaning, the seed trays will add to visual clutter until I can open the greenhouse.

Near the dining room table were the most of the things to get me going. They were only there for the photo shoot as we would end up tripping over them. This is just a small number of flats I will be starting this year. All the pots and cells had to be washed along with the seed trays. I've vowed to washed them as they are used this time so they are clean and ready to go for next year. I know I have clean ones in the shed but the entry is flooded at the moment.

So Monday I brought in a few of the cells and seed trays to wash, battling drizzling rain but thankful they were in the greenhouse not the shed. The greenhouse needs a complete clean-out but I will talk about that in a later entry. While the first batch was drying, I went to get the Stim-Root® for geranium cutting. I thought I knew right where it was but my husband did a little reorganize so it took me almost 2 hours to find it! By then the rest seemed overwhelming but by yesterday I was ready to get going. Seed sorting took longer than expected and even though I did not get any seeds planted, the soil was mixed and trays filled ready for seeding. I didn't get the aloe divided or geranium cuttings finished but I managed to get the much neglected African violet divided.

African Violet

My mom had a knack with African violets and hers always looked gorgeous likely because she was always tending to them. This was my poor, neglected African violet. It was overcrowded and in need of attention. I decided to divide the plant as from first looks there were two crowns. I also decided to propagate using the water method I saw my mom do countless times.

In preparation for this, I watered the plant well from the bottom. African violets are prone to brown water marks on their leaves so I always water from the bottom. Then I removed the dead flowers. Once it was well watered, I removed it from the pot. As suspected the plant was root bound. Dividing the smaller crown from the main plant was fairly easy to do with my fingers. Before re-potting, I cut away any yellowed leaves as well as a few for starting in water.

The Aftermath

I potted the larger piece of the plant in a 6" pot and the smaller piece in a 4" pot. Then four leaves were placed through holes in plastic wrap so their cut ends rested in the water. Once these form roots, they will be transplanted into pots. The new plant will grow from the cut end up through the soil and at the same time the old leave will begin withering. Once dead, the leaf can be removed.

This morning the new African violets appear to have survived their ordeal with no signs of shock. I'll post entries of their progress along the way.

Happy Gardening!

Garden Gnome
©2007


Friday, January 26, 2007

Vegetation & Gardening in Las Vegas

Our winter vacation was spent in Las Vegas, Nevada. We stayed at the Golden Nugget on Fremont Street in the downtown core area. While the main attractions in Las Vegas are entertainment and gambling, the area offers so much more. As always we rented a vehicle for sight seeing.

Las Vegas lies in the northern region of the Mojave Desert, a desert that is hot and dry with little precipitation, influenced by the Great Basin Desert to the north and the Sonoran Desert to the south. Although my husband insisted on wearing his famous Hawaiian shirt, shorts and sandle combination the week was really jacket weather. It was warmer than here in Zone 6A more like our later March weather but blissfully dry. The vegetation in the area always amazes me. The primary natural vegetation include: creosote bush (Larrea tridentata), Joshua trees (Yucca brevifolia) and yucca (Yucca spp.) however at higher elevations like Mount Charleston there are pine and alpine forests. Cooler winter temperatures limit cold intolerant species like cactus. We have seen a surprising number of cactus on our travels through the area. Their size can be very impressive!

Joshua Trees

The drive to Montelago Village on Lake Las Vegas takes you through desert scattered with Joshua trees. While many wildlife species use Joshua trees, we were not fortunate to see any. Lake Las Vegas lies just east and bordering on the Lake Mead National Recreation Area. Turning onto Lake Mead Drive takes you past the Tuscany Golf Club then turn up towards Montelago Village, The Falls Golf Club lies to the east just before the village. While it boasts a setting of natural beauty, there is nothing desert-like about the golf course. At night the lights of the Las Vegas strip provide a vivid backdrop for the course. The lush green of the course belies the fact this resort is in the desert, an impressive example of how much man can change his environment. Ecologically, this this is not a good thing! Of course, there is nothing ecologically friendly about Las Vegas either. Satellite images of the environmental change can be seen at USGS Earthshots.

Gardening in the Las Vegas area presents quite a few problems but mainly soil and heat. Some of the larger casinos and businesses still use grass but others are using artificial turf or xeriscapes that are water efficient with a natural desert look. However, water features still remain quite popular with the casinos. Palm trees appear to be the tree of choice for the area. This trip I noticed that many places had ice pansys (Viola heimalis) planted. Many of the homes are also using xeriscapes but we did see a few with artificial turf. Some homes had natural grass but that is discouraged due to water conservation. I noticed two things while driving through various residential areas. The first was the lack of vegetable gardens or hobby greenhouses. Given the growing conditions and urban demands perhaps this is not surprising. However, the University of Nevada Extension Service indicates that asparagus, cucumbers, onions, garlic, green peppers, squashes, table grapes, plums and some variety of tomatoes grow well with some type of protection. Potatoes and cantaloupe grow well in Northern Nevada. Vegetable gardens are possible in Las Vegas and it is more likely on this trip they were winterized. I would think raised garden beds would do nicely in Las Vegas with adequate watering and perhaps shade cloth during the summer months.

I also noticed a lack of solar panels or anything indicating solar power. This area would be perfect for solar and I'm sure it is in wide use. It just isn't an obvious thing. I can't recall seeing any CF lighting in the casinos however there were signs of other energey efficient lighting such as: fluorescent, rope, halogen and LED. Mirrors, mirrors and more mirrors amplify the lighting. In the city of lights that never sleeps even that is changing. Older signs are being replaced by newer and more energy efficient lighting and in some ways the flavour of old Las Vegas is being lost. What I've notice in our past couple of trips is an increased awareness of energy conservation especially water. The city is growing at a rate of 6,000 people per month so energy conservation is going to be a paramount concern.


Cactus Kit

I wanted to bring back a few cactus from Nevada but thought I would have problems with transporting them on the plane as well as going through customs. This cactus kit was just the answer as seeds are easily transported and seldom is the problems with bringing seeds back into Canada. The kit came with the pot, soil, dome lid and a packet of seeds containing up to ten varieties of cactus seed. The varieties include: saguaro, preckly pear, cholla, firebarrel, fishhook barrel and hedgehog. I set up the pot yesterday using about a quarter of the seeds. Germination should occur in 3 to 15 days at 68º to 80º F. I'll pick up more cactus soil this weekend and sow the rest of the seeds. Once the seeds sprout, the watering becomes crucial as too much water will cause the young cactus to rot. When the seedlings develop tiny spines, watering is decreased and the dome lid is removed. After that it is recommended to water the cactus once a month. This should be rather interesting! I report back with pictures of the cactus as they sprout and develop.

Happy Gardening

Garden Gnome
© 2007


Wednesday, December 20, 2006

Don't Throw Out That Poinsettia!


This doesn't look all that much like a poinsettia but it is a left over one from last year. It had special meaning so I decided to try saving it. I'm not sure if any red will appear this year but the plant is alive and thriving.

Once the holiday season was over, I removed the foil cover from the pot and gave the plant a good watering then kept it moist but not wet. After a couple of weeks it looked like it was dead so I cut it back to about 4 inches, watered well then left it alone. A week or so later there were signs of new growth. Once I opened the greenhouse, the poinsettia was transferred there in the hopes it would revive. Well it did and here it is a year later!

So don't throw out those poinsettias. Take a chance to try reviving them and you just might be rewarded with a lovely houseplant.

Garden Gnome
© 2006