Neighbours talking over the garden gate has long been a tradition. They share gardening tips, complain about the weather and pests yet are ever eager to discuss their gardens. That is what I had in mind when creating this blog. So stop by my garden gate to find out the latest happenings in my garden.

Happy Gardening!

Garden Gnome
"All my life through, the new sights of Nature made me rejoice like a child." ~ Madame Marie Curie"

Sunday, July 23, 2006

Rose of Sharon

Rose of Sharon (Hibiscus syriacus) is a true beauty. The name is a little confusing as it isn't a rose at all, it is really a Hibiscus. It is a medium sized ornamental bush with showy blooms throughout the summer. There are several bloom colours to choose from and the blooms can be either single or double petal. The blooms attract hummingbirds, butterflies and small insects. Rose of Sharon is a popular hedging here and it is easy to see why. The plant blooms on new growth. Pruning is best done in early spring in our area. Other than that the plant is low maintenance and will even tolerate neglect.
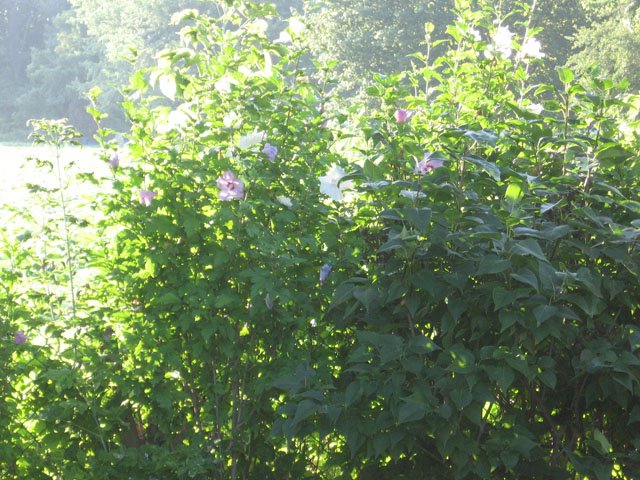
Rose of Sharon Bushes

When we bought this house we discovered an overgrown stand of Rose of Sharon along with purple lilacs. All of the gardens were overgrown and very neglected. The former vegetable garden was downright horrid! Our intentions were to rip out everything in that area and start fresh using raised beds. Only by careful observation were the Rose of Sharron was discovered. The rose of sharron were sadly neglected and overgrown with brush that needed to be cut out so we trimmed them right down. In the same area there naked lady lilies, lilacs, a ton of unidentified weeds, wild grapes, and poison ivy. We have slowly worked to irradicate the harmful while keeping what we want. The Rose of Sharron have responded by giving us blooms and healthy growth but it will be a year or two before they are as we want them. I think they are a beautiful part of our gardens. They provide a wonderful backdrop for the vegetable garden!

Hibiscus syriacus 'Aphrodite'

Aprodite was the first to bloom for us so will always be just a little special. The bloom is a single petal pink mauve with a deep magenta eye. Within these bushes there are two box elder stumps that set up shoots. They cannot be removed without damaging the Rose of Sharon and we are leary to use any type of herbicide for fear it will damage the surrounding bushes. So we keep trimming any shoots that appear. Box elder trees are really problematic here, best described as a junk tree by many.

Hibiscus syriacus 'Diana'

Diana surprised us the second year we were here. There are two bushes mixed in with the Aprodite bushes. The bloom is single petal pure white with no eye. It is a sharp contrast to the deep green foliage of the bush. There is no possibility of separating the two cultivars or either from the lilacs so we prune and let them be. I'm planning on cross pollinating the two to see what the results are.
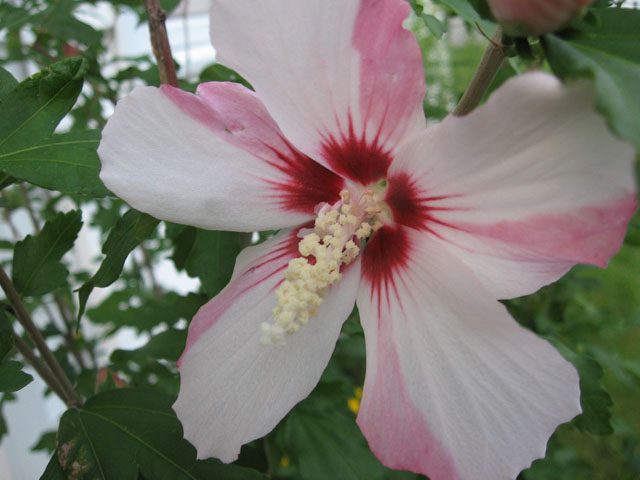
Hibiscus syriacus 'Blush Satin'

Blush Satin is very pretty! I love the colours on this plant. The blooms have a candy striped appearance with alternating bands of pale pink and deeper rose pink with a deep magenta eye. This bush is not in the same area as the others. We planted it in another area closer to the house after we discovered the other Rose of Sharon. It was only twig size and we had doubts it would survive. It proved us wrong! The bush is now about six feet tall and blooming well.

Happy Gardening

Garden Gnome


Friday, July 21, 2006

My Plants Have Issues!

This is meant to be a tongue in cheek expose. I just spent an hour or so trying to whip bed #2, the herb bed, into shape. The weatherman was wrong again so despite the promised cooler temperatures it is still hot and humid. These were some of my thoughts as I worked. Sorry no pictures today.

My Plants Have Issues!

My plants have some serious issues! Where can I find a plant psychologist? I should have known I was in trouble when I saw them out there partying with the rabbits and drinking the slugs' beer. It should have been more of a clue when my square foot gardening book landed on my doorstep with a thud along with a note that read "not in your lifetime". A day or so later a ransom note showed up asking for organic fertilizer or else. So I gave in only to realize it was some sick trick on the veggies part. Oh yes, they wanted that fertilizer to use as a weapon!

No plant wants to stay in its alloted square foot. The lemon grass needs a serious time out! It got a real trimming today so at least my hands smell nice. Golden oregano is next but they already ganged up on me so I'm in the house planning my second line of attack. Speaking of attack, the zucchini and cucumber are just taking over. Both refuse to stay in their beds and have set up a picket line I can't cross. The cucumbers have taken over the phone lines and several of the paths. They stand guard for the zucchini as if that bully needs any guarding. But they aren't the only plants with issues!

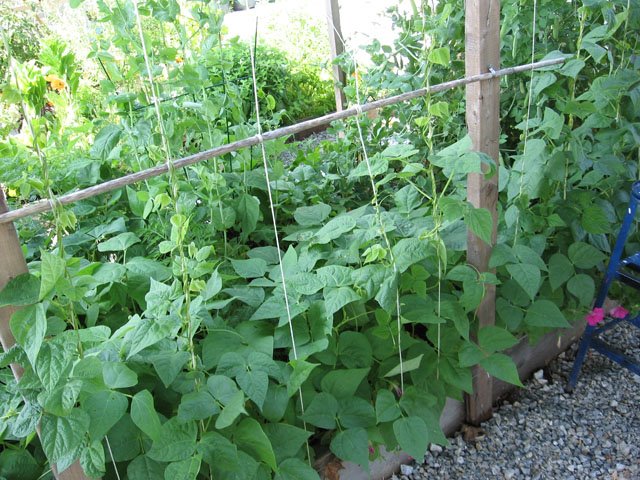
The pole beans were given an eight foot trellis. Both are very nice trellises custom made just for their own private use. That should have been plenty but NO they want more! They have talked to their union and I'm sure they will be on strike soon or I'll get another ransom note. The tomatoes have decided to fight dirty usning end blossom rot as a weapon. I think we have them appeased for the moment. Then there is the herbs. They are waging their own little war! Who wins is anyone's guess.

The rabbits are taking note while sitting in my lounge chairs sipping sun tea and observing the whole affair. They send their scouts, the squirrels out to gather information. Once in awhile they send in reinforcement like a snake just to watch me do the happy joy joy dance or heart attack which ever comes first. They have bugged the house too. It's only one fly but it is a fly on the wall with a microphone and note pad. Very suspicious if you ask me ;)

Where the heck is Dr. Phil when you need him?

Happy Gardening

Garden Gnome


Tuesday, July 18, 2006

Attack of the Monster Zucchini

The zucchini plants have decided to take over the garden. There is a little competion from the tomatoes and beans but so far the zucchini are winning.

Zucchini Plants

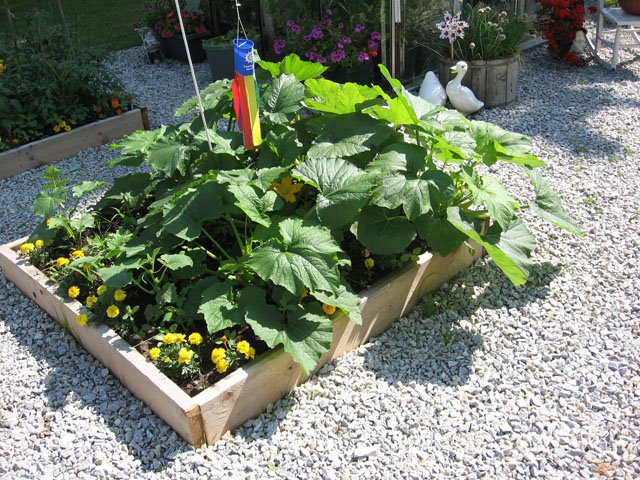
I have five zucchini plants this year. I'm averaging three to four zucchini ranging in size from six to eight inches daily. We eat a lot of zucchini! The two zucchini plants in bed #5 are smaller than those in this picture of bed #7. Bed #5 receives more shade. Bed #7 also has yellow marigolds planted around the perimeter. The front four squares are planted with cucumbers. They really need to be staked but with the zucchini crowding them, I might just let the cucumbers wander a bit. For the most part the zucchini plants are quite healthy. There has been some damage by a Japanese beetle on a couple of the leaves. I'm taking active but natural control of this insect. So far I have only found two, one on the zucchini and one on a stand of wildflowers. Both insects were destroyed and I'm keeping a close eye on all the garden beds.


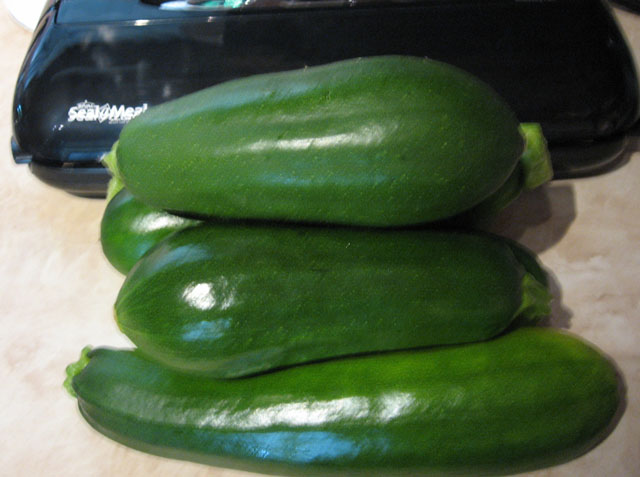
Zucchini

The zucchini are such beauties! Finding ways to use them is never a problem. Four from this stack were dried for zucchini chips. The chips are a nice low fat alternative to potato chips as they aren't fried. One was used for a quick steak and potato left-over stir fry. I will freeze shredded zucchini and we will eat a lot sauteed with mushrooms and onions or grilled. I like adding shredded zucchini to meatloaf. Other plans for using up the zucchini besides giving some away are: zucchini bread, zucchini muffins and a large batch of tomato zucchini sauce. A good friend gifted us with a very large bag of fresh caught perch so I gave him four zucchini in return. Tonight's dinner will be fresh perch and our favourite zucchini saute mix.


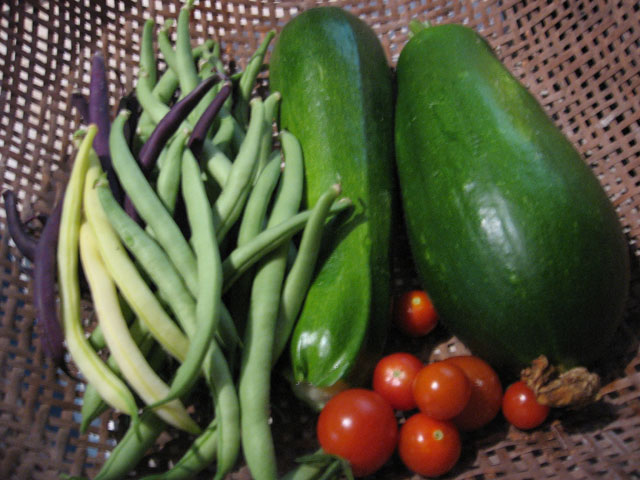
Monday's Basket of Goodies

I was pleased to see the bush beans ready for picking on Monday. Last year they did not do well especially the Royal Burgundy. This year the bush beans are performing nicely with a little over a quart a day. I'm really pleased with the performance of the Slederette bush beans so will plant them again next year. The Royal Burgundy are grown more for novelty not freezing or canning. The yellow wax beans are a little behind but have picked up the pace. The tomatoes are just starting to ripen on the outside vines. The vines all look healthy as does the fruit. I really think the trick is the epsom salt! My mouth is watering just thinking of the first toasted tomato sandwich of the season.

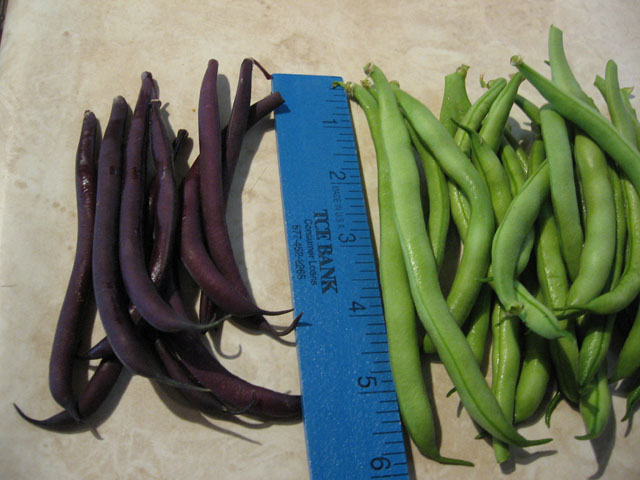
Beans

Slenderette beans are a nice tender bean averaging six to seven inches long. I like picking them young to ensure a tender bean especially when freezing. The Royal Burgundy are a smaller bean but quite tasty. The pale pinky lavender blooms give rise to deep purple beans. They tend to get noticed and commented on a lot by garden visitors who have never seen them.

Happy Gardening

Garden Gnome


Thursday, July 13, 2006

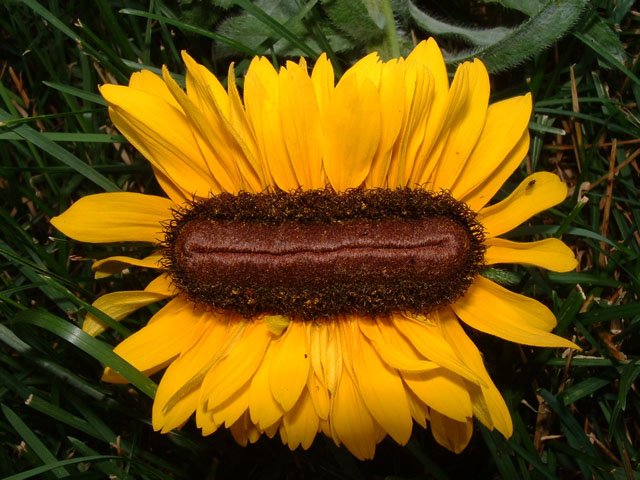
Weird Flower!

My daughter sent me a photo of one of two weird flowers growing in her garden. It appears to be a mutant form of a black eyed susan.

Weird Flower

The flowers were part of a wild flower perennial shade mix from Alymer Seeds. The other black eyed susans appear to be normal. Two of the flowers appear to be mutants. The entire head is about the size of an average palm. The centre is about two inches long. The total plant height is about two feet.

I've asked her to save the seeds from both flowers. My theory is this is some type of mutation and I would like to see if I can get the seeds to grow. They may be infertile but it's worth a try.

Happy Gardening

Garden Gnome


Tuesday, July 11, 2006

Zucchini & Tiny Tim Tomatoes

My vegetable beds are looking good for the most part with only a couple of minor problems. The peas are beginning to wind down. The beans are showing signs of a healthy harvest. The Kentucky Wonder pole beans despite my concerns over a couple of plants with yellow leaves are making daily progress and are looking quite healthy with lots of flowers. Most of the bush beans have flowers and small beans on them with Slenderette being the biggest at almost four inch long beans. It won't be long now! The herbs need serious trimming so I'll be trimming and drying herbs this afternoon.

This Morning's Basket

During my morning garden checks I note what needs attention then pick throughout the day as I see the need. This morning's pickings included the first ripe zucchini, royal red lettuce, Chinese mustard leaves, edible snow peas, and Tiny Tim tomatoes. So far, royal red lettuce has been the only lettuce not to bolt. The weather forecast is for rain today followed by temperatures in the nineties (F) for the rest of the week so that might change quickly. I expect with rain followed by high temperatures there will be a lot of changes in the gardens.

Zucchini

The zucchini plants in bed #7 are threatening to take over the garden. They are huge and loaded with baby zucchini. The zucchini plants in bed #3 are much smaller despite being planted earlier. This is the first zucchini picked from bed #7. I like picking zucchini when it is six to eight inches long which explains why I have so many zucchini plants. We eat a lot of zucchini in the summer either sauteed with onions and mushrooms or grilled. It's always a wonderful feeling picking the first of any crop and I must admit I got pleasure out of picking this zucchini. It is a little misshaped but I'm sure it will taste just fine for tonight's dinner!

Tiny Tim Tomatoes on Vine

I always grow cherry tomatoes of some type because they are expensive in the stores and kids love picking them. They make delicious snacking tomatoes too. I'm growing Tiny Tim tomatoes in the greenhouse only this year. Grape cluster is growing in bed #1 in place of Tiny Tim. I wanted to have at least one Tiny Tim plant for earlier tomatoes and to have something to compare the Grape cluster tomatoes to. One of the primary reasons for growing in the greenhouse is to collect the seeds as well. In my early years of gardening I neglected to collect seeds. Now, I collect seeds from anything I can especially the higer producing vegetables. Tiny Tim has always been a good producer for me. There is a little browning of leaves on the bottom portion of the vine. This is not due to disease but rather heat damage. The greenhouse temperatures soared while we were away on the long weekend causing the plants to dry more than usual. I was lucky that we only lost a few seedlings with the rest rebounding from the ill effects.

Tiny Tim Tomatoes

The Tiny Tim vine is loaded with cherry sized tomatoes. The flavour is good yet not as sweet as Sweet Millions. It is more a juicy burst of semi-sweet yet tart flavour. The colour is an orangy red. It is a good, dependable producer with few problems.

Happy Gardening

Garden Gnome


Sunday, July 09, 2006

Garden Delights

I've made several entries regarding vegetables so thought I would share some of my other garden delights. As I was going through the flower pictures so far, I realized most of my flower choices this year have been in the warm tones.

Asiatic Lily

Lilies are about the easiest perennial to grow! We have Tiger lilies (a common wildflower), naked ladies (Amaryllis belladonna), Stella de Oro daylilies as well as this beautiful lily. I got this beautiful what was thought to be a "daylily" from a friend who was cleaning out her garden. However, a very kind soul on the Gardenmessenger group told me it is an Asiatic lily not a daylily. I planted these lilies on the north side of the house. The colour of this lily is so deep and rich it almost looks like plastic. Now I need to research to identify the variety and how to propagate these lilies.

Water Hyacinth

Every garden needs at least one water feature. I have two but will likely add more. This year I decided to experiment using a five gallon planter with the plug left in and planted it with water hyacinth. Water hyacinth is a rather strange looking floating plant until it blooms. The leaves are thick and waxy that give no indication of the dainty pale lavender blooms to come. This plant spreads easily and is an ideal pond plant. In some southern areas it is considered a noxious weed that is to be destroyed because it spreads fast enough to block water intakes. We can grow them here as it freezes over winter to kill them off. I buy one fresh plant each spring from a local pond supply store as I've never been able to keep water hyacinth growing indoors in the winter. It hasn't been from lack of effort so once again I'll try this year.

Rose

Last fall I didn't think this rose bush would survive. A service man hacked it right to the ground! It was not a happy day for him when I found out. Thankfully the rose bush survived and has put on a wonderful display of roses. I don't know the name of this rose. This bush and a climbing rose bush were here when we moved in. Both are on the south side of the house. I'd like to turn that flower bed into a rose bed. The beautiful rosey pink roses are about 4 inches in diameter. I met a gentleman who is quite knowledgeable on roses who thought from the description it was a rose named after Queen Mary. I'll take a picture of both roses the next time I visit in the hopes he can identify them for me. In the meantime I'm reading on how to care for roses.

Coreopsis 'Moonbeam'

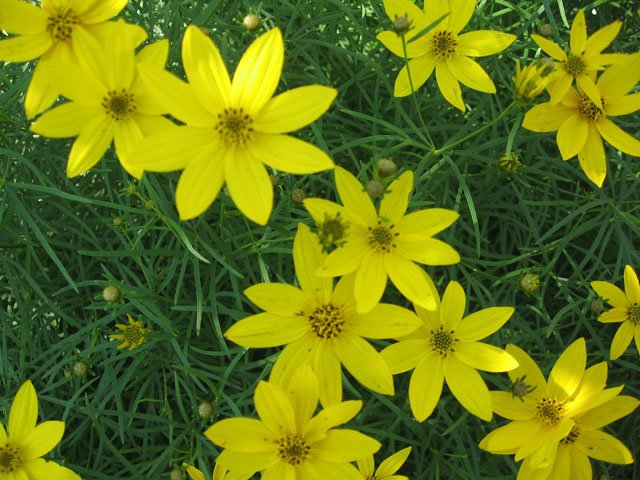
Coreopsis 'Moonbeam' is also known as tickseed. It is a compact, cheery perennial with delicate leaves and bright yellow flowers. It is a very pretty plant that is sure to bring a smile! 'Moonbeam' is not as delicate as it looks. I've moved this plant a couple of times with no ill effects. I have it planted on the north side of the house. This area also gets east and west sun exposure. Each year it gets bigger and puts on quite the display. My neighbour would like to try growing 'Moonbeam' so this year I'm going to try harvesting some seed.

Bonanza Flame Marigold

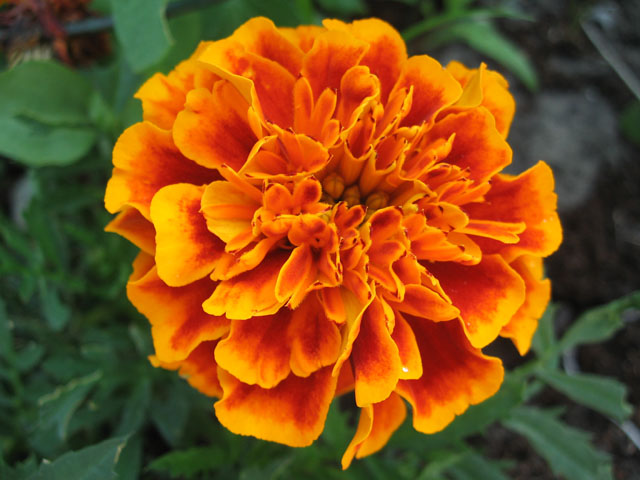
The Bonanza Flame marigold is one of my favourite flowers for companion planting with vegetables. I love the two toned colouration of this variety. It is a well behaved bushy plant that gets about nine inches tall. This marigold will give good colour from about the ADLF to the ADFF for our zone which means early May to late October. This year I went overboard. A total of ninety-six of these marigolds are planted in the front garden beds while four pots of the same sit on the stairs. Across the small west facing side of the el are another ten. At the back door are two more post of marigolds. Fourty-four bonanza flame marigolds frame bed #1 while each of the two of the new beds are framed with twenty of the same. The middle new bed is framed with twenty yellow marigolds for something different. Two more pots of bonanza flame marigolds each with seven plants are in the vegetable garden as well. That brings the grand total of bonanza flame marigolds planted to two hundred and six with about twenty-four seedlings left over!


Tuesday, July 04, 2006

Peas and New Beds

The vegetable garden beds are really enjoying the rain and heat. We've had very hot weather with high humidity that has resulted in thunderstorms later in the evening or sometimes throughout the night.

Beans & Peas: Bed #3

The beans and peas are growing by leaps and bounds. Bean varieties I'm growing include Kentucky Wonder pole (green & yellow), Romano pole, Edible Snow, Little Marvel, and Lincoln Homesteader. The vines have all entertwined so it is somewhat hard to distinguish between all but the snow peas. If left to mature the snow peas form nice sized peas. The pods are edible just perfect for stir fries.

Little Marvel Peas

This is a heritage variety of peas. The pods are deep green and nearly round. The peas are a good size! Each pod is tightly packed with 7-8 very sweet, tender peas that freeze well. I've been harvesting enough peas to fill a little over a quart after they are shelled. These are being froze as they come in. I am very happy with the performance of these peas!

The new raised beds are making good progress. It's hard to tell that beds #6 and 7 are new as they are performing well right along with the other beds. Bed #8 isn't fully planted but still looks good.

Bed #6

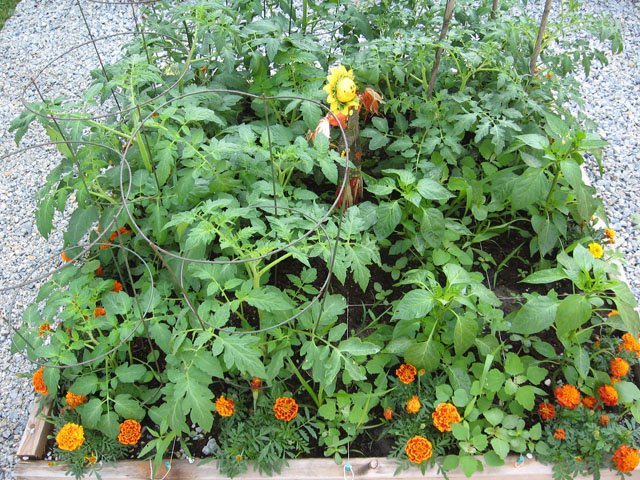
Tomatoes, peppers and marigolds are planted in this new raised bed. Considering the tomatoes were planted much later than the tomatoes in bed #1, at 20" tall they are quickly catching up to the 3' plus tomatoes in bed #1. The tomatoes are Heinz, Glamour and Beefsteak bringing the total number of tomato varieties I'm growing this year to nine. These are: Heinz, Beefsteak, Glamour, Better Boy, Lemon Boy, Big Beef, Ultra Sweets, Grape Cluster and Sweet Millions. The peppers in this bed are Ango. Other pepper varieties include Hungarian wax, bell, habanero and jalapeno.

Bed #7


Zucchini, cucumber and marigolds are planted in this new raised bed. There are already a few baby zucchini! I like picking zucchini when they are 6 - 8" long so have five zucchini plants to keep me in a steady supply. Cucumbers are grown on supports once they get big enough. I'm growing sixteen cucumber plants. Varieties include straight eight, improved long and cross country. Cross country is a semi-bush variety of pickling cucumber

Happy Gardening

Garden Gnome


Tuesday, June 27, 2006

Garden Planning

We had five raised beds and now have eight all planted in the square foot gardening method using companion planting. The beds are planted based on the ADLF. This means the cool weather crops are planted a month before the ADLF, some are planted on the ADLF and the frost sensitive plants are planted two weeks after the ADLF. For that reason garden planning is a must. This planning starts with the previous growing season. As the fruits, herbs and vegetables grow I make careful notes in my journal.

I think keeping a detailed journal is a very important part of gardening. It will help you troubleshoot and plan for the following growing season. It will help you determine which varieties do best in your hardiness zone. I record the weather conditions and how the plants are growing. Any problems such as pests or possible disease are recorded with as much detail as possible. More importantly I take pictures and include them in my journal. Quite often I will sit down in the evening, read over my notes and realize that there is a problem that needs attention. Without my notes and pictures it might easily have been overlooked. I can't stress the importance of a gardening journal enough.

Once the beds are prepared for the winter I review my garden journal and pictures then start planning for the new garden season. I make a list of what grew well then create a layout for each bed. Of the five original beds, one is dedicated to strawberries so needs no plan. The excitement grows when the first seed catalogue arrives. I like both OSC and Stokes for the ease of ordering online. Once the seeds have been ordered I start a more formal plan. I used to do this by drawing out each layout by hand but now I'm using Garden Manager Pro software. This software has the vegetable information and garden layout adapted from Square Foot Gardening by Mel Bartholmew and has greatly simplified the layout planning.

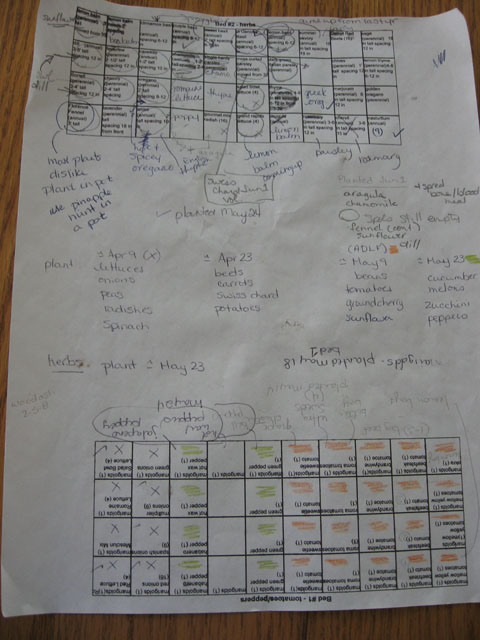
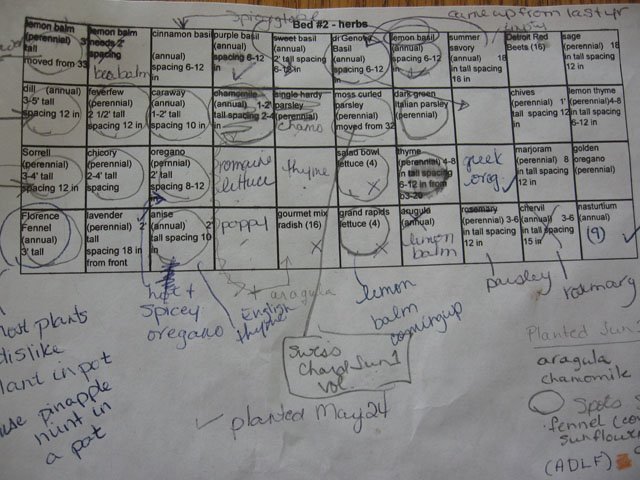
Using the recommended square foot gardening recommended densities for each plant along with companion planting recommendations, I came up with the layouts for the beds then printed them off. As you can see the working copy becomes rather cluttered. I use it for making quick changes and notes of when to plant. Like any plan some flexibility is needed. Each square has a number in brackets after the plant name. This indicates the planting density. For example in bed #2 that is home to the herbs, I decided to plant lettuce in a couple of squares. The number after the lettuce appears as (4) meaning four lettuce plants to that square. I also use colour coding for a quick visual for when to plant according to the ADLF. This is really just a simple scribble with a pencil crayon. I even use Xs or checkmarks to planting times or if the square was planted. While the working copy appears to be cluttered it holds a lot of valuable information.

Working Copy

Sometimes a quick change is necessary if a volunteer plant is discovered. In bed #5 two volunteer sunflowers came up. Since that bed wasn't fully planned, I left them where they were and just incoporated them into the final bed layout. A volunteer pea plant surprised me in bed#3. Since it was in the bed where the beans and peas were going to be planted I simply left it there and noted the change on the working copy sheet. There are times when I realize I made a mistake in the planning process as in the fennel planned for bed #2. Fennel doesn't get along well with other plants so I decided to plant it in a container. I have also realized that lemon balm is a member of the mint family so is very invasive. It is everywhere so will have to be moved out of the herb bed. Mistakes are a good thing if you learn from them.

The herb bed is the easiest to plan as the perennials are already there so planning is only needed for the annual herbs. Again quick changes were necessary. I had a problem with the germination of some herbs in the greenhouse so found myself with nothing to plant in those spaces. Unfortunately the local nuseries didn't have potted herbs that I wanted. That left me with spaces to fill. When using the square foot gardening method there is nothing wrong with leaving a space empty or filling it with a non-edible companion plant.


Herb Bed Plan

When using the square foot gardening method, the plan is only a guide. As the cold weather crops like lettuces, spinach, radishes and peas finish the squares are replanted with another crop keeping companion planting recommendations in mind. Some squares like the pole beans, tomatoes, perennial herbs, peppers and onions will remain constant without replanting throughout the entire growing season. These are the plants I use to plan the layouts. They are planned first and everything else worked around them. Even with very careful planning always expect surprises and be willing to be flexible. My peas thew me a curve ball this year. Other years they have been punny and almost non-productive. This year I tried a couple of different varieties. They are over five feet tall and we had to make emergency supports for them. I'm not complaining as they are loaded with pods but this was totally unexpected. You can bet I'll be growing these varieties next year!

Planning your garden can be a very rewarding part of gardening. A well thought out and planned garden is more likely to be successful. Start planning your next season's garden with this season.

Happy Gardening

Garden Gnome


Tuesday, June 20, 2006

Constructing a Square Foot Garden Bed

Raised beds can be used for veggetables or flowers and can be planted using the square foot method. The square foot method of gardening is ideal for smaller spaces. Constructing a square foot garden bed is very easy. Since we just installed new beds, I thought I would share how I make my beds.

In the true fashion of square foot gardening, beds are constucted 4' x 4' but you can make them any length you want just don't go beyond 4' wide. That will give you 2' comfortable reach from both sides and the ends if you make your beds longer than 4'. The reason for this is you need to be able to reach all around the bed without walking on it. Do not use pressure treated lumber! I prefer 2" x 8" or 2" x 10" untreated spruce lumber but you could use cement blocks if you know you won't be moving the bed. While no bottom cover is necessary you can use garden cloth if you want. I don't use any bottom cover. The beds are set on the grass then filled. You can make your beds deeper than eight or ten inches as well. If you have mobility issues a 36" high raised bed will make it easier to garden. The bed is constructed in the same manner but with a bottom then raised on four posts to the desired height.

Beds should be layed out in such a design to allow a 3' pathway especially if you use a garden cart or wheelbarrow. You can go narrower but 3' makes the pathways wheelchair accessible. Choose your pathway material wisely based on durability, accessibility and ease of revamping. All have pros and cons. I prefer gravel but you can use other material for the pathways. I

My beds are constructed using a simple butt joint with no reinforcement. Three long galvanized nails at each joint does the trick. When I first constructed the larger beds I thought reinforcement would be needed but after almost 4 years they still look good. The spuce weathers nicely to grey that just seems to mellow the garden. You can add reinforcement at the joints if you want. This can either be 2" x 2" or L-brackets. My beds are not anchored to the ground either because at some point I may want to change my garden layout. While that is highly unlikely I don't see the need to anchor them into the ground.

Soil is the next concern and may need to be adjusted based on your zone or the plants you are growing. Adjust as necessary based on your climate and the plants you are growing. I started out using 1/3 compost, 1/3 peat moss and 1/3 top soil. I've since modified the original beds with soil ammendments such as manure, vermiculite and leaves. I recommend using an organic fertilizer after the first year simply because like containers nutrients leach out of the beds.

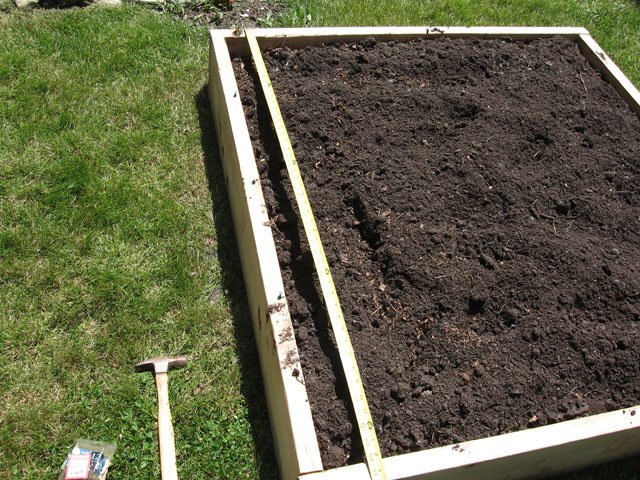
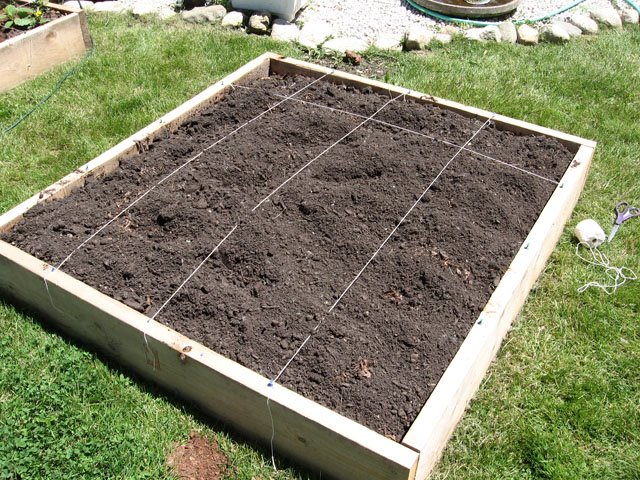
Bed constructed and filled

The actual contruction was simple so I've started the pictures at where the bed has been filled and was ready for the grid system. The grid is important as that is what forms the basis of the square foot gardening method.

Measuring Up

Once the bed is filled it is time to measure up the bed. Use a tape measure and run from end to end. Mark each side at 1' intervals around the perimeter of the bed. I now skip the step of marking and use push pins as I go.


Cotton Yarn

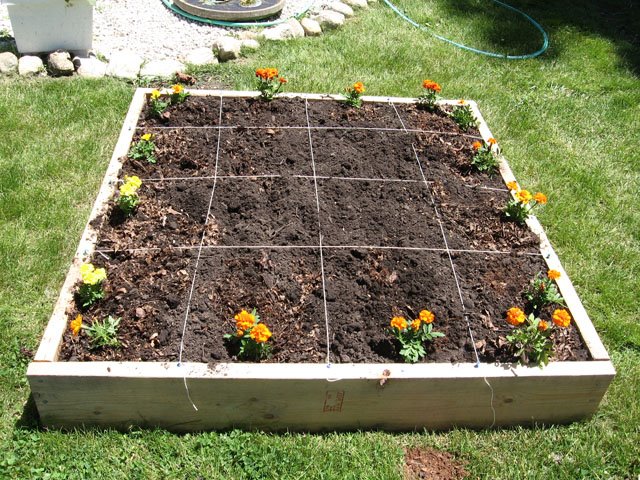
By far the most convenient, cheap way to secure the grid is push pins especially if you use cotton yarn as I do. The cotton yarn is biodegradable and birds will collect any left-overs for building their nests so it is a win-win situation. The push pins can be left in place to re-use the following growing season. However, you can construct your grid using left-over window blind slats and just nail them where needed for a more permanent grid. When constructing your grid consider that it should be removable for ease of turning the soil or adding ammendments in the spring.

Bed Ready to Plant

Once the grid is completed the bed is now ready to plant. There are some rules regarding the density. For example in 9 beans can be planted in one square. Density charts are available online. I use companion planting and observe those rules as well. Generally what goes together grows together. There is an earlier post on companion planting if you need to find out more.

Marigold Border

This bed is the last of three new vegetable beds so is destined to be an overflow bed for this year. Raised beds often need a year to become well established or at least that has been my experience. I don't expect the same results from new beds as the older beds. Once the raspberries are finished fruiting they will be moved to this bed so it will become a small raspberry patch. It will still be planted with companion plants to raspberries using the square foot method.

Well that is about it on construcing a square foot garden bed other than at some point depending on what you are growing you may need plant support. You can use trellises or even homemade designs. My beans are supported by a hockey goal post design using cotton yarn for them to climb on. Be creative!

Happy Gardening

Garden Gnome


Monday, June 19, 2006

Epsom Salt - A Gardener's Solution!

Epsom Salt

This 100% natural mineral is a gardener's solution! Epsom Salt is maganesium sulfate and it can be used to get great results in the garden as well as a soak for aching muscles after a day in the garden.

General Use: Mix 1/2 c epsom salt per gallon of water for watering potted plants. Apply 1 tsp per foot of height for each plant once biweekly.

Tomatoes: Add 2-3 tbsp per hole before planting then twice a month, sprinkle 1 tbsp per foot of height per plant biweeklyy.

Roses & Flowers: Use 1/2 c in the soil at the base of the plant then uses a foliar spray of 1 tsp epsom salt to 1 gallon water or use 1 tsp per foot at base biweekly

Peppers & other fruits and vegetables: Miz 1 tbsp per gallon of water and water monthly or us one tsp per foot of height per plant biweekly.

Outdoor plants & shrubbery: Use 1-2 tbsp around base of plants every 2 - 4 weeks.

Gardener's Dream for Tired Muscles: Dissolve 2 c epsom salt in warm tub of water. Relax while pondering seed catalogues.

Happy Gardening

Garden Gnome


Thursday, June 15, 2006

June 15, 2006 - Take Pictures!

You never know what you are going to see in your garden. If you do a 15 minute walk about of your garden as I do twice daily, you might see just about anything from the critter that is eating your beans to a wide variety of critters just visiting your garden. Pictures tell more than words so if one of your plants is doing something odd take a picture for troubleshooting. If you find an undentified insect or plant and want to know whether it is friend or foe take a picture. Chances are very good someone else has encountered that problem or insect. However pictures are not just for troubleshooting. Get close-up of your plants. Add the pictures to your garden journal along with your comments. For that reason I make it a point to never go into my gardens without a camera!

Happy Gardening

Garden Gnome


Monday, June 12, 2006

June 12, 2006 - Garden Savings

There are so many ways to save on gardening but I thought it might be a good idea to highlight some of them. I think there are four main aspects: environment, cost, time, and effort. So I'll mention a few of the things I do to save in all aspects.

Environment:
As gardeners I firmly believe we are stewards of the land. That means we should do nothing to harm the land and we should encourage as natural of an ecosystem as possible. In essence we should leave the land better than we found it. Since we are planting things that don't normally grow wild we still need to encourage birds, butterflies, beneficial insects and etc. At the same time we need to control the harmful invaders if we want a crop so we need to find a balance. My rule of thumb with any type of pest control is to use the least harmful method possible. In some cases this is fencing when dealing with the larger animals but it is environmentally friendly. My second rule of thumb is organic as near as I can get. Our lot backs onto farmland so I can't be sure his sprays don't get on my garden but I can be sure that I haven't put any sprays on the garden. But there are other ways to save environmentally.
Establish a compost whether it be bin or pile. Compost is just good all the way around. It gives nutrients to your plants, retains moisture in your beds, and get rid of garden and kitchen waste making it the perfect recycled ingredient. For the past few years I've used a very simple pile method. My municipality had a special on compost bins for $25 so I decided to pick one up. I'll still run the pile because the garden has expanded enough to need more compost. Composting is a must!

Water! It amazes me how we take water for granted even for our gardens. Then it boggles my mind that someone will tell me their garden is organic even though they are using municipal water. Hello! That water is treated and in many areas still has both floride and chlorine in it when it comes out of your tap. I've designed water barrels to collect rain water of which I will be posting a step by step method of constructing them. So check back here for those instructions. Those with ponds will know that pond water makes great fertilizer while watering your gardens. If you have fish in your ponds do not use the water for edible plants. Your flowers and lawn will love it. I maintain a water feature or two in my garden.

Cost:
There are just so many ways to save on gardening. I think this might warrant a separate post. Get clippings or seeds from others which is why I'm trying to start a seed exchange on my yahoo group. Take clippings and save seeds from your own plants. I have heard others have had luck with bargain priced seeds. I can't comment on this. However check back here as I will make a post just on saving money.

Time & Effort:
Sometimes together and sometimes not but they always seem to fall together. You either have a lot of time and no effort or visa versa. I think one of the biggest bains of gardening is weeding. So here is my method. I do a complete walk through the garden morning and evening. It takes me about 10 minutes and as I go I pull any noticeable weeds. I might deadhead a plant or check for insects. The important thing is keeping a close eye for any problems. It also is a nice way to start the day and end the day. Now 10 minutes doesn't seem like a lot of time but it is more than enough to keep any weeds under control and check for any problems. Sometimes I'm in the garden several times a day. I always pinch, weed, deadhead, and observe because I know it saves me a lot of time and energy later.

Happy Gardening

Garden Gnome


Monday, June 05, 2006

Baby Birds & Bunnies

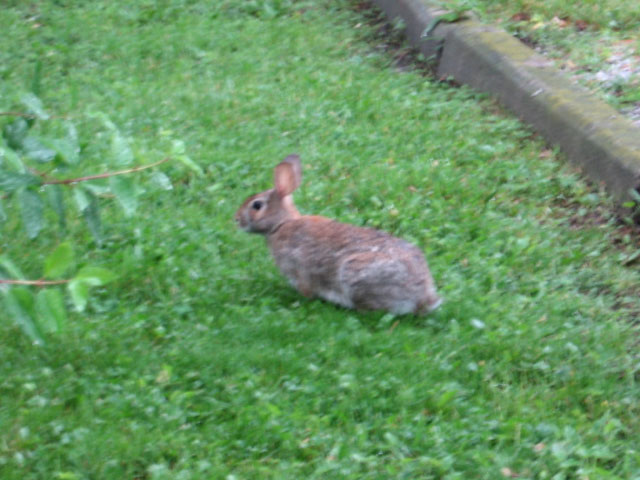
One of my first blog posts was about bunnies. We have a healthy and abundant jackrabbit population. From experience, the jackrabbit population is cyclic. Last year they never bothered with my vegetable garden or if they did, I never noticed. This year they like the garden and have quickly become a problem. Not so much "they" just one very persistant young one. Young rabbits are like teenagers - no fear and very defiant!

Rabbit

I left the greenhouse light on, left a radio playing and turned the motion activated spray to very sensitive. This little guy danced to the oldies while taking his shower and munching on salad! So I added bone/blood meal to the garden beds as apparently they don't like the smell. I can't really blame them! I also added a large plastic owl to the bed the rabbit seems to prefer.

Plastic Owl

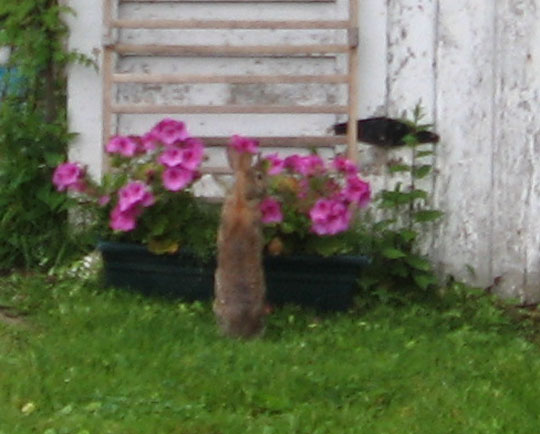
So far so good in the vegetable garden. But yesterday I looked out and what did I see - the young one and either a friend or family member! They were "in" the window box planter on the ground planted with Martha Stewart geraniums.

Rabbit in Windowbox

Apparently they like safflower seed even though they aren't supposed to like it and they thought the window box was a perfect stool for them to sit on. I liberally applied cayenne/powdered pepper mix to which they thanked me and asked for more. My luck they will make friends with the owl and get him dancing to the oldies as well. Heaven help me if they discover the slugs' beer. I give up!

We are fencing the vegetable gardens keep the rabbits out. The original vegetable bed has a gravelled holding path and area for hardening off plants. The greenhouse is in the corner of this area followed by three raised beds perpendicular to the greenhouse and two raised beds perpendicular to the three beds forming a large rounded on one corner gardening area. I really like the design and flow of the garden. We decided to add three 4' x 4' beds that originally were going to sit along the side of the garage. Now, my husband thinks it would be best to align them along the holding path creating a regular path there and adding a new holding bed so the greenhouse will be sitting about a third of the way into the garden with raised beds on both sides. He thinks it will be easier to fence. The boxes have been constructed for awhile so it is only a matter of adding soil later today. We'll remove the border rocks then extend the paths to the west. I intend to put in a small gated arbour then 3'rabbit proof fencing along with a 8" wide raised bed running along the entire perimeter to be planted with marigolds. So another year of gardening additions begins!

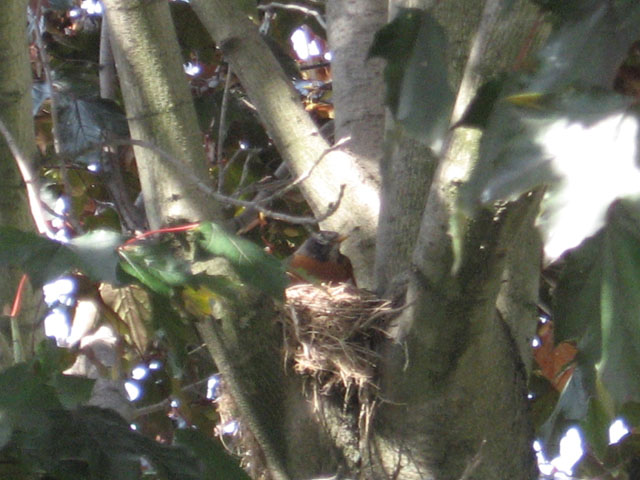
During the spring I watched a pair of robbins build a nest in our maple tree so I wasn't surprised to see part of a robbin eggshell under the tree.

Robbin's egg

My husband had been planning to trim the tree but agreed to leave it be until the babies left the nest. I had the advantage of being able to view the nest from one of our front windows. Both parents were very agressive towards other birds to the point I had to stop feeding the bluejays peanuts.

Robbin on Nest

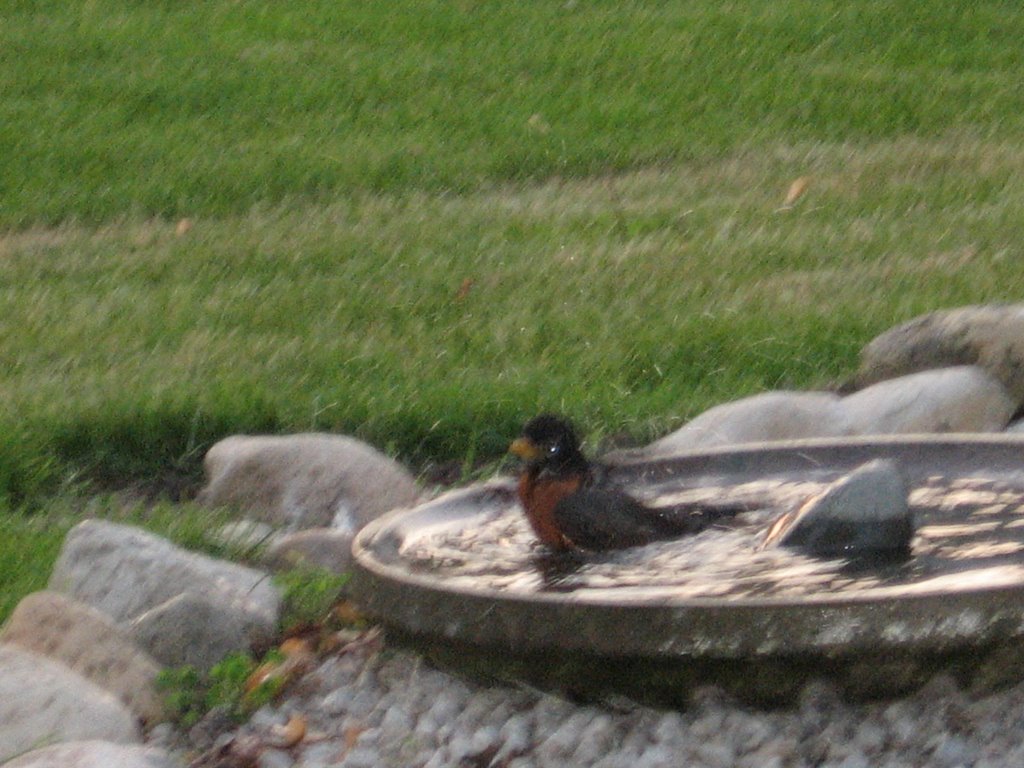
They even went after the squirrels! For some reason they didn't attack the sparrows likely because they didn't see them as threat. The male robbin likes to follow me around when I water the garden and he will let me get quite close to him. It is a rather funny sight so I've been told. He stays about four feet behind me the entire time I'm watering. Both robbin parents really appreciate the garden bird bath. They are regular visitors in the garden and despite other reports that robbins can do tomato damage, I have yet a problem with robbins.

Robbin in Birdbath

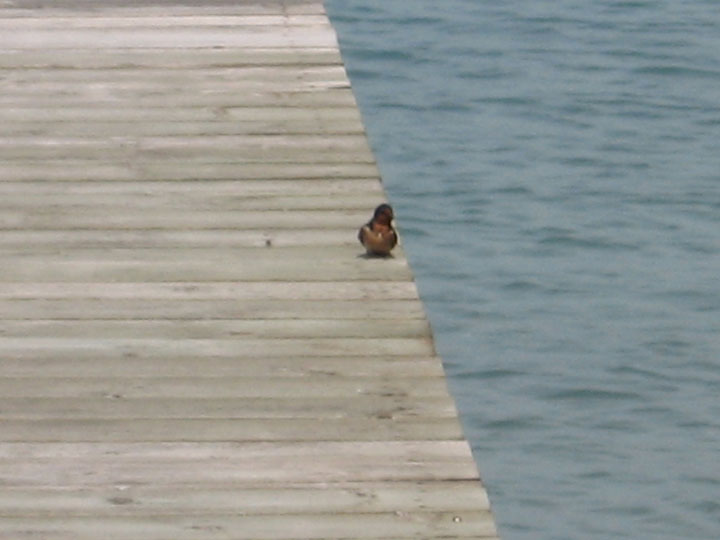
We have swallows on our dock. When they are nesting they create a real problem by swooping low towards your head usually three or four at a time. This basically makes the dock unusable for about a month so a lot of people use plastic owls to prevent them from building a nest in the first place. These staunch little birds stand guard allowing no one onto the dock or even near it. They will immediately take flight and swoop at your head as soon as you try to go onto the dock.

Swallow

I tried to ward them off this year by putting that same plastic owl on the deck for a morning. The swallows were so distressed I just couldn't leave it out there as there were likely babies in the nest. A couple of days later I managed to get on the dock to see that there were a couple of babies. I'm so glad I removed the owl! My neighbour says a swallow's nest brings good luck and I can use all the good luck possible.

Yesterday, I noticed the robbin's nest was very quiet. By now it is apparent the babies have flown the coop. While I'm glad they are old enough to fly I was saddened that the nest was empty. Then this morning I noticed the swallows are no longer standing guard. Their offspring must have flown the coop too.

Happy Gardening

Garden Gnome


Monday, May 29, 2006

Watering Tips

Watering can be the single most make or break of gardening. Improper water whether too much, too little or at the wrong time can spell disaster. So here are some of my watering tips most of them learned through trial and error. They are by no means perfect and you will have to adapt to your situation.

Timing:
I prefer to water in the early morning before the full force of the sun hits the plants. Water acts as a magnifyer to the sun's rays causing sun burn on the plants. Watering in the morning also helps them get through the heat of the day. The only time I water during the heat of the day is if I see a plant in distress. Most times this is a container plant that dried out too quickly. Then I hand water the soil not the plant. I have watered in the early evening after a very hot day to give my plants a little pick-me-up but I'm always sure to water early enough that any wet foliage is dry before nightfall. Sometimes raised beds just like containers need a little extra water. Watering at night without time for the foliage to dry encourages mold and fungus. Wet soil encourages snails and slugs.

Amount:
I think this is one of the critical points to watering. Make sure you water enough but not too much! A brief spraying isn't going to do any good. It will create demanding plants with shallow roots. Too much water will create water logged soil and unhappy plants dying from root rot. So you need a happy medium. In general water once a day but only if needed. Soak the soil well but don't oversoak. For containers that means soak until water runs out the drain hole then stop. My rule with my raised beds is when I see small puddles I know that is enough water. You really have to dig into the ground to see how far the water has penetrated to determine how much to water with raised beds but once you've watered them a few times you will instinctively know. A rain guage is handy when watering raised beds. Watering both raised beds and containers are different than watering traditional in the ground gardens because the soil is controlled but the principles are the same. My neighbour has a large in ground vegetable garden. He handwaters if necessary but seldom uses the hose and never a sprinkler. Basically he let nature take its course. Then he complains his garden doesn't do well. OTHO, I have over producing raised beds watered regularly but not always daily depending on the weather.

Weather:
Sorry but if you are going to garden you need to pay attention to the weather. That means learning to read the skies and keeping in tune with your local conditions. I have found true the the sailors warning is true and being a boater I heed that warning, there is no point watering my garden if the sky is red in the morning. If the night is clear and there is a ring around the moon, don't water because rain is coming! If the leaves on your trees especially maple are turning over, don't water because it is going to rain. I can smell when it is going to rain because of increased ozone in the air but some can't pick up on this smell. My bones ache when it's going to rain too so that is another sign. In our high tech days, sometimes we fail to notice these signs. As gardeners check your weather report and planting guide daily but also learn some of the old ways to help you with your watering needs.

Water:
We are under water restrictions here allowing for watering every other day. I devised rain barrels to help with the watering if needed. We live on the water so we could always cart water to the gardens but that is rather a pain as would pumping water to the gardens. Rain barrels are inexpensive and easy to set up. Get a 50 gal plastic drum and remove the lid. Add a spiggot with hose attachment near the bottom if desired (preferrable). Test you spiggot for leaks "before" continuing. Turn the barrel right side up and attach window screen to the top of the barrel. This will keep debris and leaves out of your barrel. Place your barrel near your downspout. Cut downspout and/or redirect into the centre of the barrel. Wrap chicken wire around the barrel and secure. Now, push the barrel into place. The downspout should be in the centre of the barrel. Plant vining plants of your choice such as ivy or clematis around the base of the barrel. These will grow up the chicken wire masking the barrel. When your barrel gets about half full, add feeder goldfish or ruby red minnows to control mosquitoes. Now you have an inexpensive but visually appealing water barrel to help your watering needs. There are two ways to use your barrel. Hook up a soaker hose or hand water. If you have access to a natural source of water which we do you can either cart water or hook up a pumping system if allowed. Some municipalities will not allow you to do this but most will. If you can it will provide a nutrient rich souch of water hopefully chemical freee. At any rate any type of water souce for your garden should be used to its full potential without wastage. Municipal water is easier to use but conservation is still necessary. In most cases there is a charge for municipal water.

Methods:
This is by far the largest area to differ on. I like easy methods that don't waste water and for that reason I "prefer" soaker hoses. They can be concealed by mulch or ground cover. Once in place they only need to be hooked up and used with draining in the winter if you are in an area that freezes in winter. No muss, no fuss and easily adaptable to the water barrel. They best part is of all watering methods they put the water where it is needed and reduce evapouration and wastage. Second to that I use hand watering for the vegetable gardens consisting of a multi-sprayer set to shower. In the greenhouse I use the mist or shower setting but my son is experimenting with a drip system so that might be changing very soon.

Hand watering by watering can works well too. It is more time consuming but can be a great diversion for a restless young one :) I still very much enjoy watering this way. My neighbour still does it this way the majority of the time.

Sprinklers waste a lot of water through evapouration, large coverage area and they soak the foliage creating problems you don't want such as mold and fungus especially if used in the evening. There is a tendency to overwater because you walk away then forget the sprinkler is on. The problem is they are a cheap and easy solution for the novice gardener. So most of us have at one time used them and some of us still do. I think a rain guage is important when using a sprinkler. Water to your desired amount in the guage then turn the sprinkler off. While a sprinkler is an easy solution, try to use it only when necessary.

Containers present their own problems because they can dry out so fast. I use the shower setting with the hose but have come up with a couple of other ideas. I'm testing my sons drip system on a couple of plants so if that goes well I'll post the instructions. So far so good. I use the wick method on other container plants. Simply take a plastic container like a sour cream container. Fill with water. Poke a hole in the top and tread synthetic wick through it long enough to reach the bottom of the container. Put the lid on the container. Push wick up through the drain hole of the pot to near the surface. Set pot of reservoir (plastic container) and the plant will water itself for about a week. Use larger reservoirs for larger containers.

Miscellaneous:
While you are considering water, add a water feature or a couple of bird baths. You want to encourage birds, butterflies, and bats into your garden. They all need water. There are several ways of doing this of which I won't go into detail now. Keep your bird baths clean. Change the water daily! Add the sounds of water flowing buy using a smal recirculating pump and air tubing to create a fountain or bubbling water. Birds are drawn to the sounds of tinkling water. The sound is rather pleasant while you pull weeds in the garden :)

Happy Gardening

Garden Gnome


Monday, May 22, 2006

Attracting Butterflies

Butterflies are a beautiful sight in the garden but more important they are pollinators so should be encouraged in your garden. Some decide to plant a specific garden to attract butterflies while others like me encorporate butterfly attracting plants and elements into the garden. I plant marigolds aroung the perimeter of one of my raised beds that is home to tomatoes, peppers, onions, and lettuces. Marigold is the perfect companion plant for these vegetables for pest management yet they are perfect for attracting butterflies! Many herbs and flowers are perfect companion plants. Most will deter the damaging pests yet encourage the beneficial allies.

Here's my number one rule: if you want butterflies, don't use pesticides indiscriminately! Instead rely on natural insect control like companion planting, toads, birds, bats, lady bugs, rosy red minnows and parasitic wasps. Keep your plants healthy by proper watering, not over crowding them and regular fertilizing to help ward off insect infestations. If you really must use some form of pest control, try the simplest solution first like manual removal. If that doesn't work, use Safer's Insecticidal Soap or a homemade solution of 2 drops liquid soap, 2 drops vegetable oil dissolved in 1 quart water. The homemade insecticidal soap is likely the strongest chemical I've used in my garden in the past four years. With that being said, here are tips to attract butterflies to your garden.

Butterflies are insects that go through a complex life cycle: egg to caterpillar to chrysalis to butterfly. It is important to recognize the stages of the butterflies you are trying to attract so you don't inadvertedly destroy them. It is also important to understand that there may be some foliage damage ranging from minor to severe during the caterpillar stage. There are two ways to deal with this problem. Plant some sacrificial plants, remove the caterpillar to those plants and let them be or plant a special butterfly garden away from your vegetable garden. You can simply manually remove and destroy which is not the best solution but sometimes may be the only way to save your favourite crop.

Butterflies need the basics including a food source for caterpillars, full sun, sheltered areas to reduce wind, water, and nectar for the butterflies. The most successful butterfly gardens bloom from early spring to late fall. Include native plants in your garden including some weeds like milkweed and thistle. Emphasize red, yellow, orange, and purple single blossom flowers. Here are the top 20 plants that butterflies love: aster, bee balm, butterfly bush, butterfly weed, cardinal flower, cosmos, globe thistle, goldenrod, joe pye weed, liatris, lilac, marigold, mexican sunflower, phlox, purper coneflower, scabiosa, stone crop, sunflower, yarrow, and zinnia. Other plants include members of the carrot family, cleome, clover, dill, dogwoord, hollyhock, milkweed, snapdragon, thistle, violet, and willow but be aware that certain caterpillars will feed on the foliage. Night blooming plants are attractive to many moth species.

Butterflies are cold-blood so like to bask in the sun. Add flat stones to a sunny spot in your garden for them. Male butterflies like a wet patch of mud or sand for "puddling" and will often gather in large groups to lap up the minerals. Use a shallow dish or birdbath to provide water for butterflies.

Here's my second rule: take pictures! Get close and personal but get those pictures not only of the butterflies but any other life stage you can find. Some caterpillars are absolutely gorgeous! Keep details such as when to discovered the butterfly, caterpillar or chrysalis along with what plant you discovered it feeding on. This will help you fine tune your butterfly garden.

Happy Gardening

Garden Gnome


Saturday, May 20, 2006

Deer!

Sometimes you can't win for losing. Now I haven't seen the deer myself or any indication there have been deer in the gardens but my neighbour three doors down has some really nice pictures of deer in his back yard. I'm not really sure what to do. I've been fighting the wild rabbits and think I have them under control. I sat in the garden until dark and saw no signs of deer then spred more mothballs around the perimeter and the garden pathways as well as turned the motion activated sprayer up to full tilt. I fear that if deer are in the immediate area, I might just as well shut down the gardens. I'm not sure how else to deal with it. We would need at least a 6' fence and I honestly think if we decided to fence we would add some type of topper to keep all the larger animals out.

So far the garden looks good. There is no sign of any type of damage from any animals although we know something larger was in the garden a couple of nights ago. A larger bucket was overturned the next morning. It was large enough that a squirrel or even large bird could not have done it and I doubt even a rabbit but could be. I'm going to try a radio playing in the greenhouse along with the mothballs and the motion activated sprayer. Time will tell if I'm sucessful.

Garden Gnome


Tuesday, May 16, 2006

A Walk Through My Garden

Come take a walk through my garden. This is a longer post with a lot of pictures. Relax and enjoy.

One thing that you will notice as you walk through my garden are dandelions. We live on the water and have a field behind us. Dandelion control is a lost cause. I don't like to use herbicides that could get into the water so the dandelions stay. Yet in some ways they are a welcomed sight in the spring with their cheery yellow blooms. We enjoy the untreated dandelion leaves in salads.
Dandelion You will also notice lots of little garden decoration whimsy and flowers in the vegetable garden. We have little ones that love to find a surprise hiding under the leaves of growing plants. I love flowers in the vegetable garden as well so that's where you'll find them.

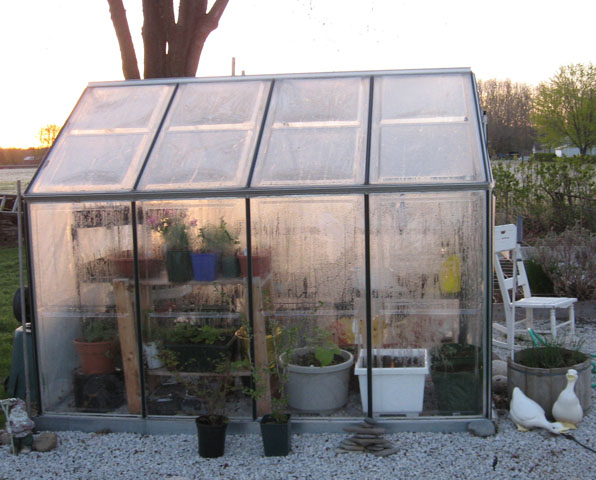
Greenhouse The greenhouse is the focal point of the garden. It is a small 6' x 8' hobby greenhouse. I grow some plants to maturity as well as start a lot of seeds in the greenhouse. I opened up the greenhouse in March. It really gets too cold to leave the greenhouse operational during the dead of winter. However, by March it was warm enough the nigh temperatures in the greenhouse stayed just above freezing.

I've had an old rocking chair in the garden for some time now. I think it signifies Mother Earth. It makes a lovely spot to set potted plants.
Rocking Chair Last year I had geraniums on the chair. This year the geraniums are sitting beside the rocker and I have marigolds planted in the pot on the rocker. So far there is no sign of seedlings yet.

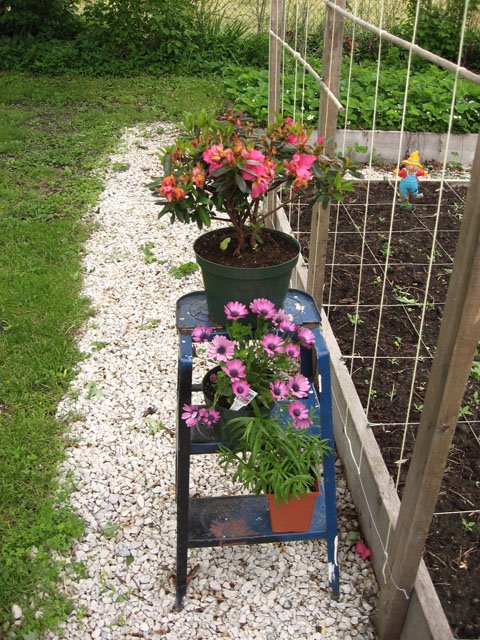
I'm short and the pole beans grow to about 8' on trellises so I need a step stool in the garden. The pole beans are grown in bed #3.
Step Ladder I figured that since the pole beans haven't been planted yet but the ladder was out I might as well put it to good use. The potted flowers will be moved when the ladder is needed.

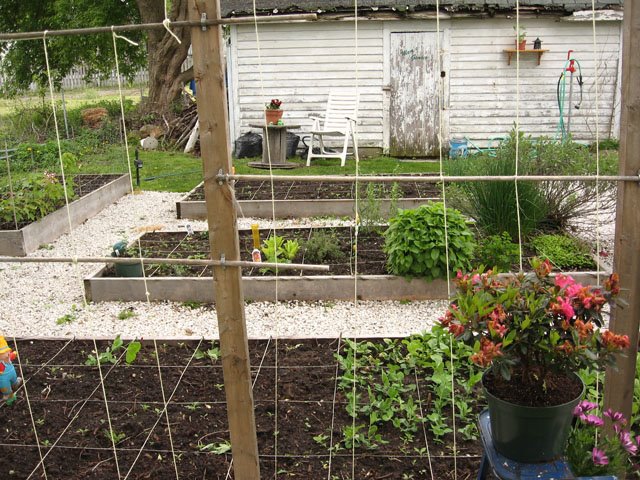
The main vegetable garden is planted in raised beds. Each bed is planted in a particular fashion using companion plantings. Bed #1 holds tomatoes, peppers, and onions. Bed #2 is home to herbs while beans and peas are grown in bed #3Beds # 1 - 4 Bed #4 is completely filled with June bearing strawberries. It wasn't meant to be this full but they filled in the bed so we have just left it.
Beds #1, 3 and 5 Beds #1-3 are 4' x 10' while beds #4 and 5 are 4' by 8'. The beds include companion planting that includes some flowers like marigolds, nasturtiums, and petunias as well.

Bed #1 and 5 This picture was taken just after tomatoes were planted. The marigolds haven't been planted yet. At the front of bed #1 there is a window box of panseys outside of the bed followed by lettuces and onions in the bed. It will be another couple of weeks before we can plant the various peppers in this bed. Later, as the tomatoes grow my husband will add the removable A-frame trellis that supports the tomatoes. Another 16 tomato plants will be planted in a new raised 4' x 4' bed outside of the main vegetable garden.

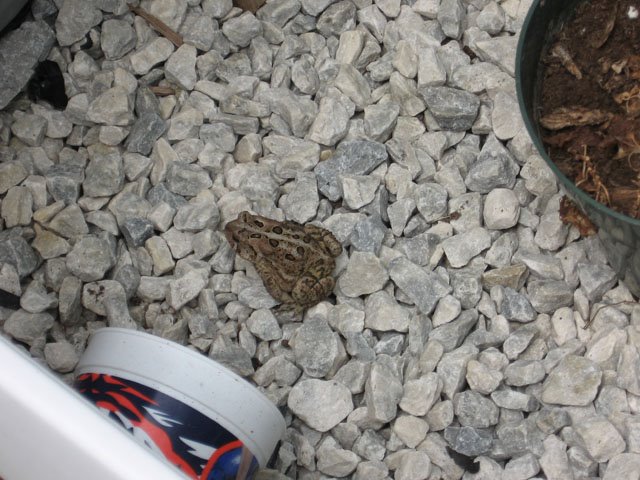
Toads are special and are welcomed in my garden anytime. They can eat an incredible amount of insects in a evening! For that reason, I don't use pesticides such as Sluggo. This type of pesticide will go through the skin of toads, killing them.
Toad So I was thrilled when I found one little guy decided to take up residence in my greenhouse. Then looking around the greenhouse I found another toad trying to get into the greenhouse. I must be doing something right to be blessed with toads.

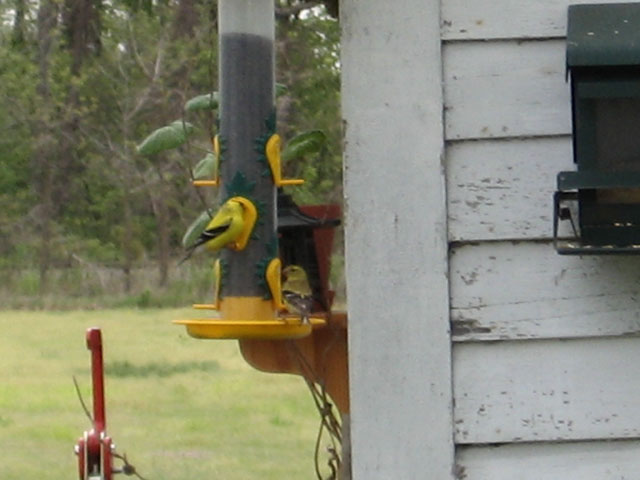
I mentioned in a previous post how I try to attract birds to my garden. Well, these little guys love niger seed so I have a feeder special for the smaller birds. The easiest way to control the types of birds in your garden is through choice of seed followed by choice of vegetation.
Goldfinches I put up one feeder on the shed wall then filled it with a corn mixture. That was a huge mistake something I realized after chasing off two wild rabbits. I should have known better! I changed that seed to black oil sunflower seed only to be bombarded with starlings and grackles. Somehow the cowbirds missed it. The starlings are so aggressive that they chase away the song birds so I changed the black oil sunflower seed for niger seed, something the starlings don't seem to like. However, that is rather expensive so I'll be replacing the niger seed for safflower seed. Safflower seed will attract the song birds as well as cardinals. So I have three bird feeders all aimed at attracting songbirds without creating a problem by attracting unwanted critters. On feeder holds sunflower seeds. It is squirrel and large bird proof. The hopper birdfeeder will hold safflower seed to attract more song birds and the tube feeder is aimed directly at the finches.

I hope you enjoyed the walk through my garden.

Garden Gnome


Saturday, May 13, 2006

Come Wander Through My Garden Thoughts :)

Where do I begin? This entry is more of a mish mash, or wandering through the garden. We were on vacation in Las Vegas and arrived home mid Thursday morning. I think I worried the entire time we were gone about the gardens even though I knew they were in very good hands. My son took the seedlings home to baby them while my neighbour took care of the main vegetable garden beds and the greenhouse. When we left Las Vegas it was 94 o to arrive in Detroit at 60o and rain. Then we drove through blinding rain to get home! Despite lack of sleep I was itching to get out into the garden so was a little disappointed when the rain refused to let up.

Yesterday brought more rain. I wanted to get the beans planted but there wasn't enough of a break in the rain. So I contented myself with online research and tidying up my shopping list. Now this is just not a good time of year for me! Honestly, I'm not a shopper until it comes to plants. That means I "have" to stop at every nursery or garden spot for miles around. That means I end up with more plants than I really need. My son picked up the seedlings from my other son so they are back in the greenhouse. He also picked up wood for a 4' x 4' raised bed except he got pressure treated instead of plain spruce. So that bed will be used for flowers or shrubs only. The plants brought indoors are also back in the greenhouse and the electricity has been re-connected.

I woke late this morning to more rain. Drat! So I decided to at least do a little work in the greenhouse. It wasn't much but at least I made a list of exactly what plants I have so I wouldn't inadvertly buy duplicates. Then I went shopping at the local vegetable stand. The have nice, healthy plants! I bought a couple of hanging baskets of petunias, sweet peppers, ultra sweet tomatoes, big beef tomatoes, and coleus. My son arrived with enough wood for 3 more raised 4 ' x 4' beds. He assembled the beds but they are still empty until my husband can give his input as to location. At the moment they are forming a diamond pattern that is rather appealing. That means another 48 sq. ft of grass gone withouth the other 16 sq. ft bed to be planted with flowers. If it were up to me I'd have no grass at all. I seriously hate grass! It is boring yet in some cases high maintenance. I'd like to turn the front yard into a wildflower bed essentially eliminating all grass. This just might be the year.

The main vegetable garden beds are doing remarkably well! The peas will need staking shortly. The lettuces and radishes are promising to be bumper crops. I need to take pictures of both. The herbs are doing well too. Unfortunately the unplanted squares have attracted a few weeds but that will be easy to remedy. I planted asparagus the day before we left for vacation but there is no sign of growth.

I posted about bird feeders so thought I should follow it up with this comment. Choose your seed wisely. It will determine not only what birds eat at your feeders but also what wild life the droppings might attract. I feed the blue jays daily with a handful or two of unshelled peanuts. They take everything within a very short time so the peanuts don't attact any wild life. However, I filled the one feeder with a generic mix that included corn. This really wasn't too smart as the day we were leaving two wild rabbits were happily munching away at the droppings while the starlings/grackles fought to see how much they could spread the seed. My husband emptied that feeder before we left and I filled it with black oil sunflower seed today. Another feeder holds black oil sunflower seed but only the smaller birds can get to it and a third holds niger seed. The first feeder with be changed for safflower seed. The cardinals and smaller birds like safflower but the starlings do not like it at all. If you research the birds in your area, you will find out what attracts them. If you find one seed is attracting unwanted attention from certain birds or other critters, change the seed.

Chives! I'm going to do a whole post on the topic of chives but for the time being, chives are already being cut here. These are almost like weeds. You can't kill them and they spread like wildfire. However, they are the ultimate addition to so many dishes so I grant them a little lee way. This year I split my chive section up. I ended up with a half barrel, two large pots and I'm giving away chive plants. Even if you don't eat chives it is one of the easiest herbs to grow and it is very pretty. I love the flowers!

Well, now that I've wandered, I really need to sit down and do a little more planning. I'm garden shopping again likely in the morning but if not Monday morning. I really, really, really "need" a new garden gnome! My old one is looking a little ratty but he'll just get moved to another spot in the garden. I was rather proud of myself this year. I love garden decorations as long as they don't interfer with the function of the garden. This spring I tossed out a lot of garden decorations that either were too ratty or no longer met my needs. However, a garden gnome is a must :)

Happy Gardening

Garden Gnome


Tuesday, May 02, 2006

Birds, Butterflies and Bats

Too often we focus on the garden pests without paying much attention to the beneficial garden visitors. These visitors should be encouraged as they help keep garden pests under control. They are a sign of a healthy garden. Make your garden a haven for these visitors. Don't use pesticides!

Butterflies:
You can't have butterflies without the caterpillars that will do some foliage damage but you can attract them to your garden along with a plant or two you are willing to use as butterfly bait for the caterpillars. Put these plants just slightly away from your main garden bed. Carefully remove any offending caterpillars to the appropriate bait plants. This will allow them to mature to the butterflies you want without destroying your crop plants. Plant flowers to attract butterflies. Marigolds and petunias are especially beneficial as companion plants in the garden and should be planted throughout the garden. In general butterflies like red, yellow, orange and purple single blossom flowers. Some herbs like dill, echnacia, and yarrow will attract butterflies. I had a swallowtail caterpillar last year so have already planted a pot of parsley to transfer any caterpillars to this year. If possible, plant a few milkweed plants to attract Monarch butterflies. Other great butterfly attactors are aster, bee balm, members of the carrot family, cleome, clover, dogwood, hollyhock, snapdragon, thistle, violet, and willow. We are very lucky that we have a nice patch of wild violets!

Birds:
Birds can be very beneficial in the garden. I always hang at least one bird feeder and plant sunflowers for the birds. This is for the seed eating birds but anyone who has ever fed birds know that each variety of birs will attract otheres including the insect eaters like woodpeckers. We have a lot of sparrows. I have caught them on more than one occasion eating insects and spiders around the windows even though they love to eat from the feeders too. House and gold finches seem to prefer the feeders. We have at least three blue jays each with their own personality. They prefer unshelled peanuts and sunflower seeds. They are very entertaining birds especially when they are chasing squirrels out of the garden. Larger birds like the common grackle, robin or larger crow will take care of grub problems and they will help keep caterpillars under control. They seem to be attracted by other birds! If you are lucky you will attract a hawk or two. Hawks will go after the smaller birds but more importantly they will keep the rodent population in check. Owls will do the same thing. Attracting birds to you garden is easy keep in mind the basics of food, water and shelter. You will need to provide one or more feeders and keep them filled. Birds need to know they have a secured food source. For best results use squirrel-proof bird feeders unless you want to go through a lot of seed very quickly. Add a water source. Try to mimic natural water puddles by placing a shallow bird bath at ground level in a shady spot. If cats are a problem, raise the bird bath a couple of feed and keep it away from shrubs. A small pump can be used to create the sound of tinkling water. This will help attract birds and provide a soothing sound in the garden. The final thing needed to attract birds is shelter preferrably natural as in shrubs and trees. Add nesting boxes (bird houses) and nesting material.

Birds add an entertainment aspect to the garden. We live on the water so have the benefit of enjoying water fowl as well as song birds and birds in general. I think all birds are song birds after observing them so long. Some have songs that are prettier than others. Our water birds include many varieties of duck, tundra swan, Canada geese and the ever almost annoying cliff swallow. They have nests under our dock so I have some really nice pictures of the babies. However, for their size they are vicious little birds swooping within inches of your head if you try to use the dock before the babies leave the nest. My neighbour says they are good luck so they stay. The water birds don't bother the gardens with the exception of the swallow but only if they have a nest nearby. Some birds like my blue jays have their own personalities. Big Blue sits on the porch railing waiting for his daily peanuts. If they don't come fast enough he moves to the window sill where he will peck at the window until I toss out his peanuts. Little Blue sits on the eavestroph watching this closely and always manages to scoop up a few peanuts before Big Blue does. Neither are concerned over the door opening. Robins have their own personality as well. One robin decided to ensure his worm supply last year by following me around the garden when I watered. He'd stay about 4 feet behind me and followed me everywhere as long as the hose was on. We thought this was hilarious so my husband video taped him. Birds are welcomed in my garden anytime!

Bats:
Bats are very beneficial in the garden. Some eat frogs, small mammals, fish and nectar but the majority of bats in a typical garden eat insects. The common brown bat can consume several hundred mosquitoes in a night as well as moths and beetles that can do a lot of damage in your garden. Mature trees provide roosting spots for bats. If you don't have mature trees install a bat box. Build the bat box from wood, and stain them brown to help retain the heat. Bat boxes should face south. Boxes smaller than 20 inches across by 24 inches tall likely won't be used. Chambers can be made using wood slats. Bat boxes should be mounted on the side of a building at leat 12 feet from the ground. Provide a water source larger than an average bird bath so the bats can swoop and grab a sip while flying.


Monday, May 01, 2006

Odds and Ends

I really enjoysunrises and sunsets so I take a lot of pictures of them. This morning, the sky was threatening rain. The clouds were heavy enough to wipe out any sunset. I pondered the gardens while sipping on my morning coffee disappointed there wouldn't be a gorgeous sunrise to great the day. One thing I've learned living on the water is nature never disappoints. The water constantly takes on a life of its own. Today was no different.
Tundra Swan
Three tundra swans swam by so I couldn't resist taking a couple of pictures. The lighting was a little too low an I used the zoom so the picture is a little grainier than I would like. One of these days I will get the perfect picture of them but for now I'm just happy they blessed my day.


I just realized that while I've talked about my gardens, I haven't really posted pictures of them. I have five raised beds planted in the square foot method. I use push pins to attach cotton yarn to form the grids. This picture was taken a sunrise a couple of days ago. Sunrise is one of my favourite times of the day. Here you can see part of bed #1, bed #2, bed #4 (strawberries) and bed # .
SFG beds
The grids remain for the entire growing season. A particular vegetable is destined for each square. Each bed has a specific use though. Squares are replanted as needed so most of the time the beds are rather full.


I have a love hate relationship with the greenhouse. I wanted it so bad yet didn't know that most times I would be fighting it. It does extend the growing season by about a month on each end. However, because of its size, it is difficult to heat properly in cold weather and overheats in July and August. Last year, we cleared it out for the summer months. Still it is useful and a beneficial addition to the garden. Here are a couple of pictures of the greenhouse.
Greenhouse at Night
Until the past week or so, I used a 150 watt grow bulb to light the greenhouse. Being energy conscious, I changed that bulb out to a 26 watt CF floodlight. So far I haven't noticed any problems with the plants.
Sunrise on the Greenhouse


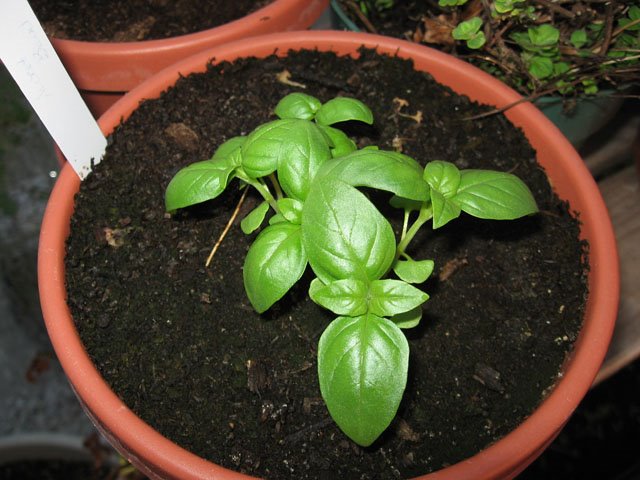
Basil is one of my favourite herbs. Each year I experiment with different basils but always grow sweet basil. Basil pesto freezes well and basil makes a really nice vinegar.
Sweet Basil
This year I'm growing purple basil, cinnamon basil, sweet basil and lemon basil. Basil is an annual here so I start the seeds in the greenhouse. When frost threatens, I bring the basils into the house to enjoy a little longer. Unfortunately, basil tends to get leggy indoors so usually by mid January, the plants aren't very good. A little tip for basil is to root it in water. Take a snipping from the main basil plant. Fill a jar with water then cover with plastic wrap. Poke a hole in the plastic wrap to put the snipping then wait for it to develop roots. Either leave as is or pot in soil. This is one way to extend your basil yield.


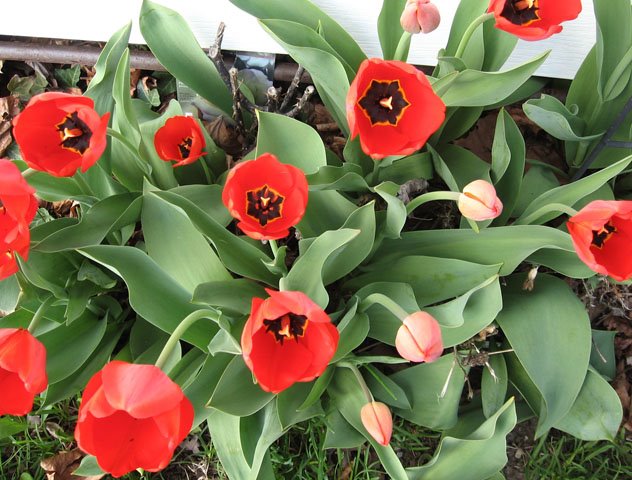
I love tulips so they grace along the south side of the house. They make me smile as they wave gently in the wind. I was very concerned today as the house was being power washed. I know the service is professional and know what they are doing but that didn't stop me from worrying.
Tulips